Diya Rangoli With 7-4 has become a favourite among learners on our channel — and once you try it, you will see why.
Diya Rangoli With 7-4 Dots | Deepam Muggulu Best Kolam Designs. This tutorial will show you how to draw Beautiful Indian traditional art Diwali Rangoli patterns using materials such as dry rice flour, colored sand or flower petals Rangoli designs by Aishwarya. Simple rangoli Kutti Kolam pattern is created on the floor in living rooms or courtyards. Draw the Lines step by step as it is shown in this video and will be awesome Rangoli Design. 😲 The Diwali rangoli pattern here is one of the amazing latest flower kolangal designs. Simple Rangoli Designs and easy rangoli designs by Aishwarya with dots for beginners and intermediate.
1. Diwali Rangoli 2. Pongal kolams 3. Pongal rangoli designs
4. Sankranthi designs 5. Easy rangoli for sankranthi 6. Pongal designs
7. Latest rangoli for sankranthi 8. Marzaghi kolams 9. Best kolangal
10. Easy rangoli designs 11. Rangoli Designs for Bhaubeej 12. Thipkyanchi Rangoli Designs
13. Simple Karthigai Kolam 14. Karthika Masam Chukkala Muggulu 15. Tulasi Kota Muggulu
Tip: Practice on paper first if you are new to dot kolam. The grid is the same; only the surface changes.
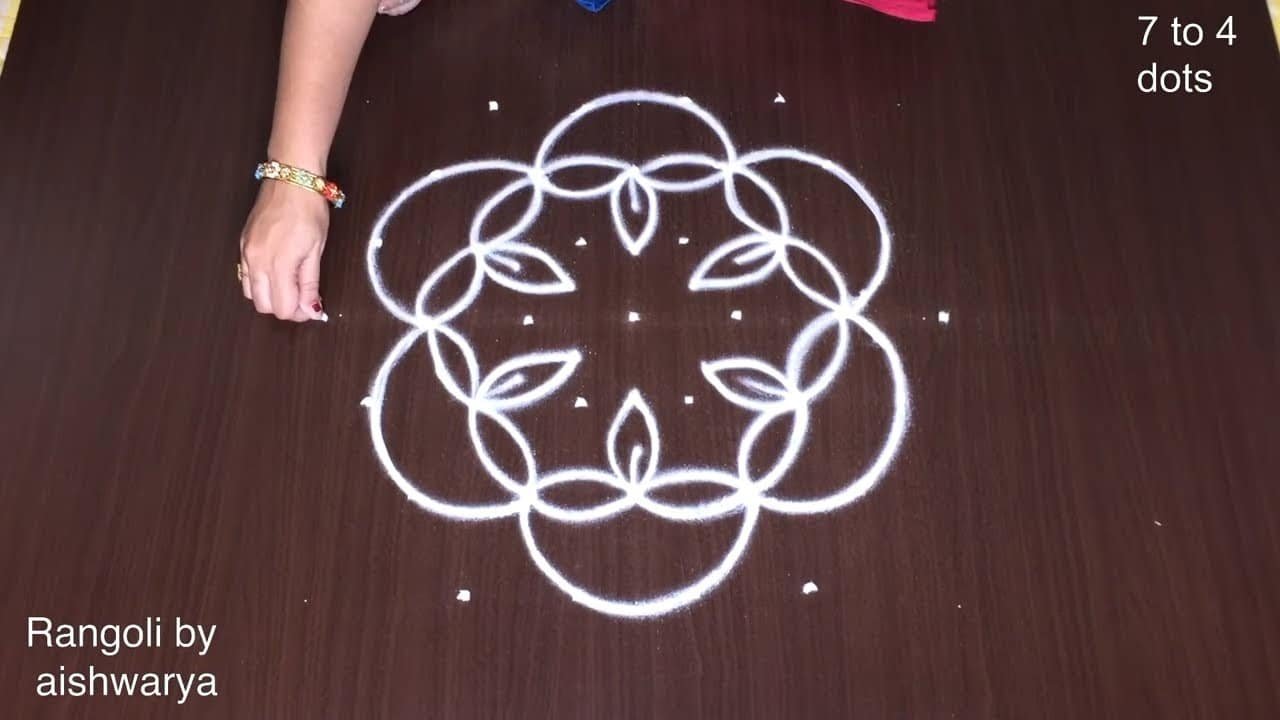
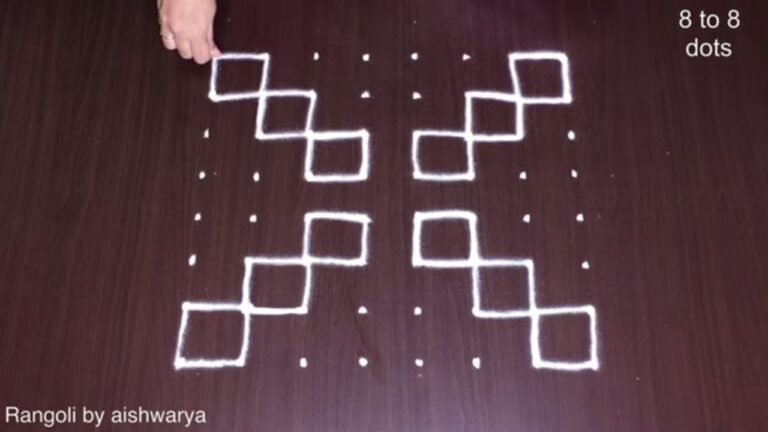
The diya rangoli with 7-4 dots is a beautiful and traditional design often created during Diwali to symbolize light and prosperity. This pattern is characterized by its intricate arrangements of lamps or diyas, which are typically drawn at intervals within the dot grid. Beginners can find this design both engaging and rewarding, as it combines simple shapes with the potential for artistic expression. To explore more designs, you might enjoy creating a simple rose flower muggulu as well.
To create this diya rangoli, one can use materials like colored sand, rice flour, or flower petals, enhancing its visual appeal. The 7-4 dot structure provides a solid foundation for the design, allowing for detailed work. As you progress, you can add personal touches or even experiment with colors that reflect the festive spirit. For additional inspiration, you can check out the simple Pongal pot koalm which showcases another easy-to-follow rangoli pattern. For further reading about the art of rangoli, visit this Wikipedia page.
Diya Rangoli With 7-4 — Step by Step Guide
Use the steps below as a reference card while the video plays. Most learners finish on the second attempt.
- Clear a flat surface and set down your dot grid using rice flour or chalk.
- Confirm the dot spacing is even — uneven dots are the biggest cause of wobbly curves.
- Begin tracing from the centre outward, following the curves shown in the video above.
- Fill the petals and sections with your chosen colours, working one area at a time.
- Finish the edges with a fine line for a sharp, photograph-ready result.
What You Will Learn
- Simple Rangoli Designs
- Rangoli
- Muggulu
- Rangoli Designs
- Rangoli Kolam
- Kolam
Frequently Asked Questions
How do I draw this rangoli?
Start by marking an even dot grid on a flat, clean surface. Once the grid is in place, connect the dots following the curves shown in the video. Even spacing between dots is the single biggest factor for a clean finish.
Is this suitable for beginners?
Absolutely. You can pause and rewind the video at every step. The pattern is straightforward once you have the grid down.
What materials do I need?
Rice flour, coloured rangoli powders, and a clean stretch of floor or paper. Some draw with chalk first to set the grid before powdering over it.
How long does it take?
Roughly 9 min 50 sec to watch end-to-end, and 10–20 minutes to draw yourself depending on grid size and how careful you are with the curves.
Practice this design a few times and you will find your own variations emerging. That is half the joy of kolam — every artist leaves a fingerprint on the pattern.
Leave a Reply