Looking to learn Rangoli With Different Shapes? This step-by-step guide walks you through every line, dot, and curve.
Rangoli With Different Shapes Geometrical | Simple Kolam 9 Dots Straight Muggulu | RamRangoli Thank you so much for watching Channel
My Ram Rangoli Channel Contains : Rangoli Designs Sankranthi Muggulu
Diwali Rangoli Ratham Muggulu Kolam Designs
Muggulu Designs Chukkala Muggulu Easy Rangoli
Simple Rangoli Easy Rangoli Designs Dhanurmasam Muggulu
Melikala Muggulu Geethala Muggulu Sivarathri Muggulu
Tip: Use chalk to lightly mark your dot grid first — it wipes away cleanly once your rangoli is finished.
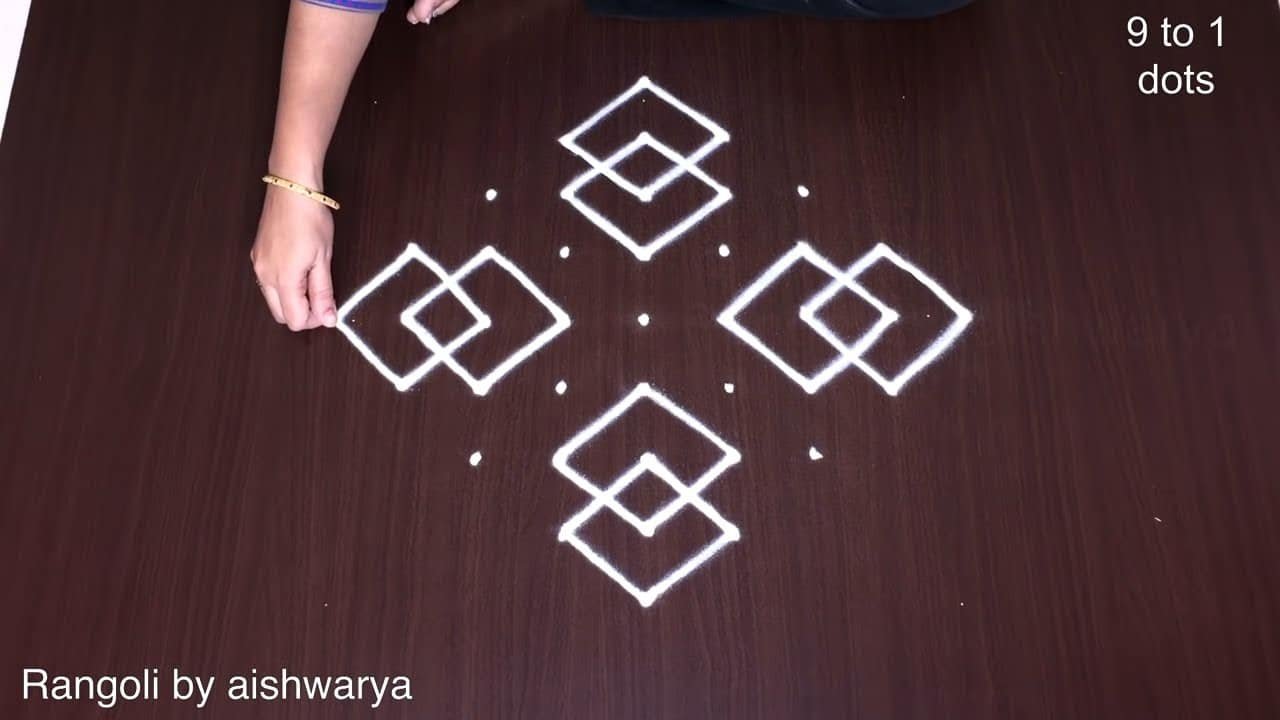
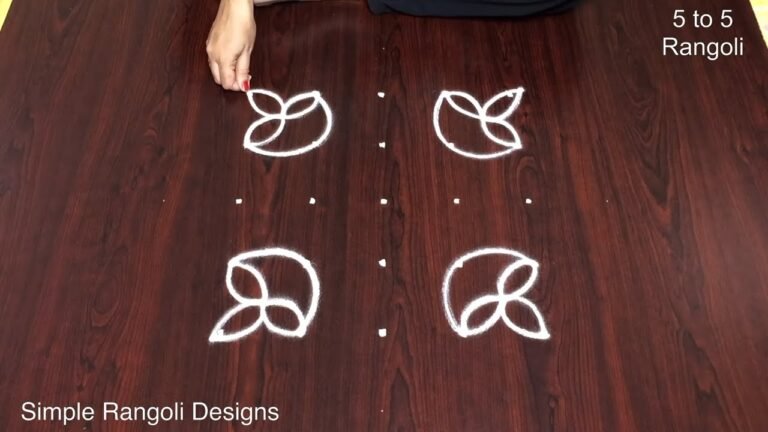
This rangoli with different shapes features a beautiful array of geometric patterns created using 9 dots. This design is particularly appealing for beginners, as it allows for creativity while maintaining a structured approach. The use of straight lines and angles can enhance your understanding of symmetry and balance, leading to stunning visual results. For those interested in exploring more geometric designs, the Perfect Geometrical Shapes Rangoli is a fantastic option to try.
Often crafted during festivals and special occasions, this style of rangoli adds a unique touch to celebrations. The 9-dot arrangement offers a versatile canvas, enabling artists to experiment with various shapes and colors. As you practice this design, consider incorporating elements from other rangoli styles, such as the intricate patterns found in the Traditional Friday Diya Pulli Designs Rangoli. This will enrich your skills and allow you to create more complex and eye-catching designs for your home.
Rangoli With Different Shapes — Step by Step Guide
Here is how to draw it, line by line. Take your time on the corners and the symmetry will take care of itself.
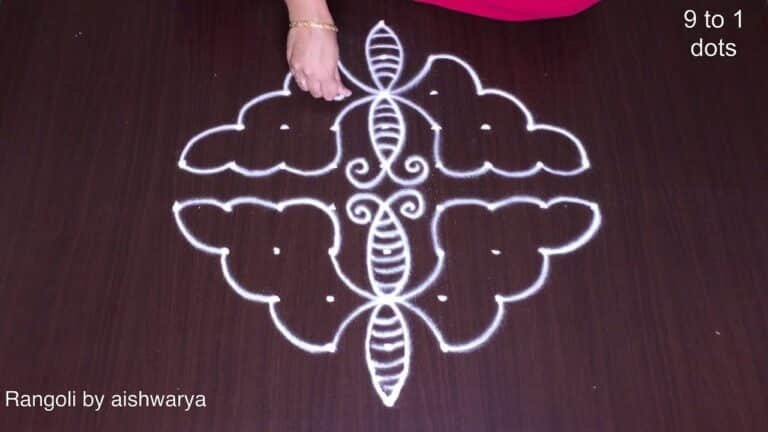
- Mark the 9-to-1 dot grid – a rhombus field with a 9-dot centre row tapering to a single dot at top and bottom.
- In the centre draw a square set on point (diamond) and fill it with two overlapping squares to form an eight-point star, with a small flower or dot at the very middle.
- At the four sides of the centre (up, down, left, right) draw a small box and fill each with a fine criss-cross net (padi lattice) so they read as hatched squares.
- Around the central diamond and between the boxes add pairs of pointed lotus petals radiating outward.
- At each of the four diagonal corners draw a spiral coil and fan a comb of small petals from it, making a curl-flower in every corner.
- Finish the lower points with two small parrot shapes and join all the shapes with light curved lines. Leave the kolam in white.
What You Will Learn
- Simple Rangoli Designs
- Rangoli
- Muggulu
- Rangoli Designs
- Rangoli Kolam
- Kolam
Frequently Asked Questions
How do I draw this rangoli?
It looks complex but follows a simple rhythm: dots first, then loops. Mark the grid, take a breath, and trace the curves at a steady pace. The pattern emerges on its own.
Is this suitable for beginners?
Absolutely. You can pause and rewind the video at every step. The pattern is straightforward once you have the grid down.
What materials do I need?
Powder (white for outlines, colours for filling), a flat surface, and a dot stencil if you want absolute precision. Beyond that, just your hand and a steady pace.
How long does it take?
The video runs 9 min 18 sec. In practice, most learners take between 10 and 20 minutes — a little longer the first time, faster as the pattern becomes familiar.
A reminder that beautiful art does not need expensive materials — just a steady hand, a clean surface, and a few pinches of rice flour.
Leave a Reply