Whether you are decorating for a festival or your daily morning ritual, Karthigai Deepam Kolam Designs is an excellent design to keep handy.
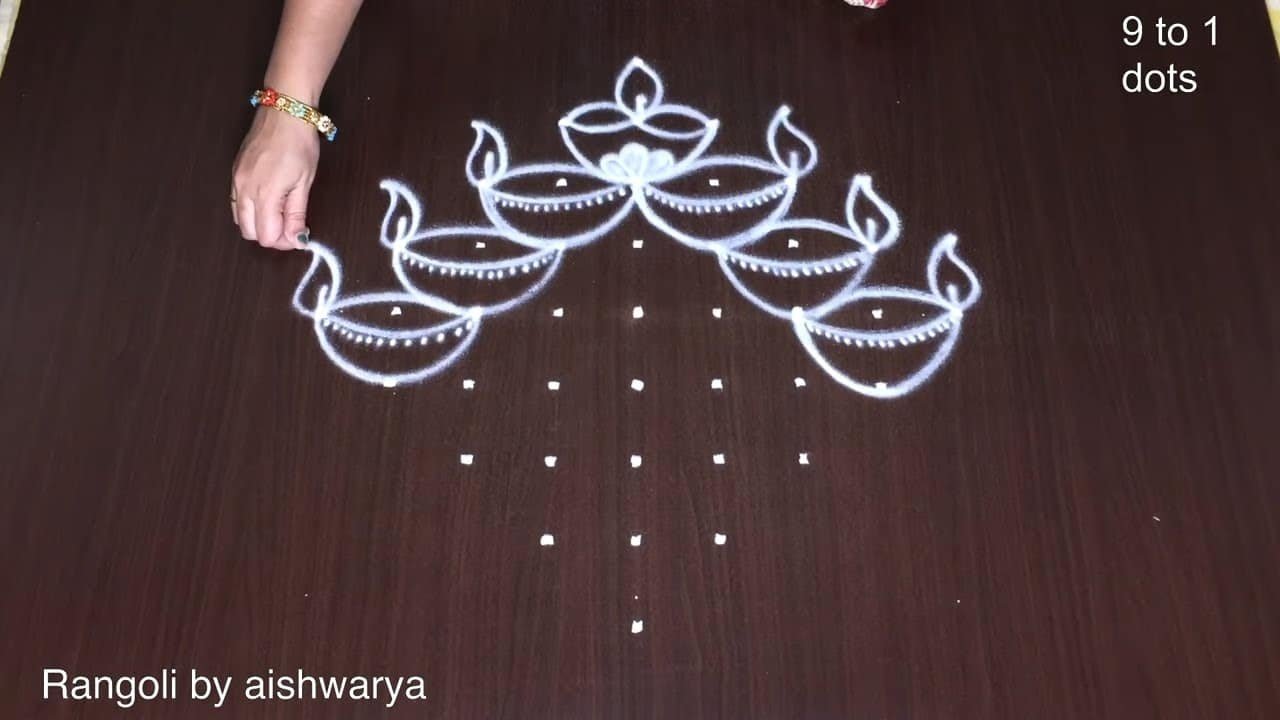
Karthigai Deepam Kolam Designs | Rangoli 9 to 1 Dots Wonderful Diya Muggulu Thank you so much for watching Channel
My Rangoli Channel Contains : Rangoli Designs Sankranthi Muggulu
Diwali Rangoli Ratham Muggulu Kolam Designs
Muggulu Designs Chukkala Muggulu Easy Rangoli
Simple Rangoli Easy Rangoli Designs Dhanurmasam Muggulu
Melikala Muggulu Geethala Muggulu Sivarathri Muggulu
Tip: Use chalk to lightly mark your dot grid first — it wipes away cleanly once your rangoli is finished.
Karthigai Deepam Kolam Designs, characterized by their intricate patterns made with 9 to 1 dots, beautifully celebrate the festival of lights. These designs often incorporate traditional elements such as diyas, symbolizing the illumination of homes and hearts during this auspicious occasion. The use of vibrant colors and meticulous detailing creates a warm ambiance, making it a delightful addition to any household. For more inspiration, check out our Lotus Flowers Rangoli Designs for Sankranti and Basic Daily Flower Rangoli posts.
The 9 to 1 dot arrangement in Karthigai Deepam Kolam provides a fantastic platform for beginners to explore their creativity while learning about traditional art forms. This style allows for various interpretations, from simple to elaborate designs, enabling everyone to participate in the festivities. As you create your own kolam, you can learn more about the cultural significance and techniques behind rangoli by visiting this Wikipedia page. Embrace the joy of this art form as you illuminate your surroundings with beautiful patterns.
Karthigai Deepam Kolam Designs — Step by Step Guide
The video above shows the full sequence; the steps below summarise each stage so you can glance back as you draw.
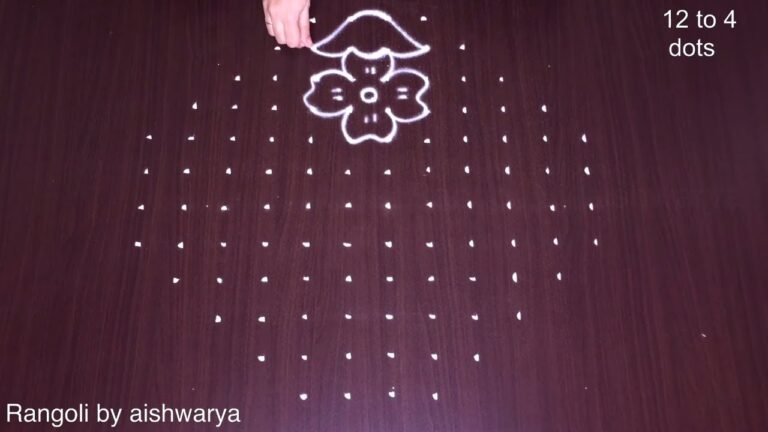
- Mark the dot grid.
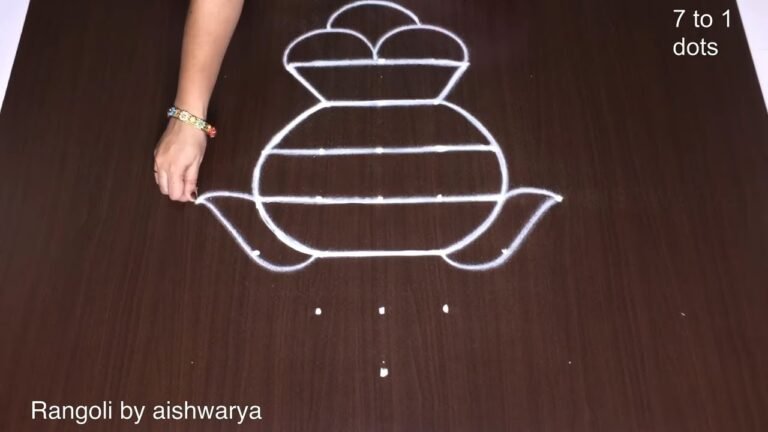
- Start at the bottom with a large lotus: draw several pointed lotus petals and curl the outermost petals into spirals on each side.
- Above the lotus draw a horizontal row of oil lamps (diyas), each a small curved bowl topped with a pointed flame.
- Build a crown at the top: an arc of diyas with a raised central lamp and smaller lamps curving down on either side.
- Link the sections with curling tendrils and small spirals along the sides.
- Add a tiny flame above each lamp and small dot accents to finish.
- Trace the whole kolam in white rangoli powder.
What You Will Learn
- 9 To 1 Dots Rangoli
- Karthigai Deepam Kolam With Dots
- Diya Muggulu Designs
- 9-1 Dots Kolam
- Deepam Rangoli With Dots
- Rangoli With Dots
Frequently Asked Questions
How do I draw this rangoli?
The grid comes first. Use a soft chalk to dot the surface, count twice to confirm the spacing, then start connecting them following the video. Work from the centre outward.
Is this suitable for beginners?
It is one of the more forgiving designs in our collection. Beginners often pick it as a confidence-builder before moving on to larger grids.
What materials do I need?
Just three things: powder (white plus any colours you want), a flat dry surface, and a few minutes of focus. A small bowl per colour helps keep things tidy.
How long does it take?
Plan for roughly 4 min 13 sec to watch and 15 minutes to draw. The second attempt is always cleaner than the first — that is the nature of dot kolam.
Once you get the rhythm of this design, try scaling it up or experimenting with colours. The grid stays the same; the personality changes.
Leave a Reply