If you enjoy dot-grid muggulu, 9 To 3 Dots is a satisfying pattern that comes together in just a few minutes.

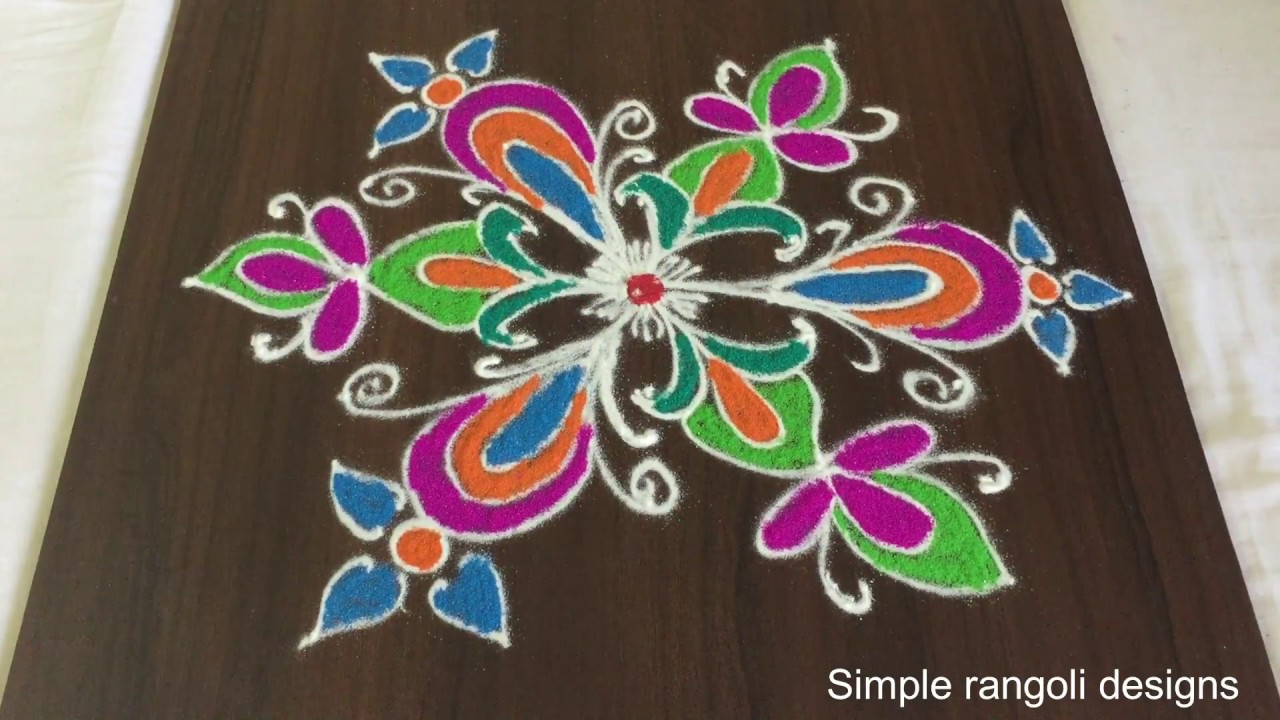
Looking for a unique 9-3 dots birds kolam for Dussehra? This beautiful festive rangoli design combines symmetry, creativity, and celebration spirit. In this video, we create a 9-3 dots birds kolam, structured on a compact decreasing grid that allows smooth bird outlines and balanced decorative curves. The 9 to 3 format is ideal for small to medium entrances, offering enough space for detailing while keeping the design neat and manageable.
🕊️ What You’ll Learn Step by Step: Proper placement of the 9-3 decreasing dot grid Forming symmetrical bird shapes smoothly
Maintaining balance along the central axis Clean finishing touches for a polished festive look Dussehra symbolizes victory and positivity, and decorating your entrance with a themed kolam enhances the festive atmosphere. The 9-3 grid naturally guides spacing and proportion, making it beginner-friendly while still appearing detailed and elegant.
Even though the layout is compact, the structured dot placement ensures clean symmetry and a visually pleasing result. Watch till the end to see the complete transformation — the final symmetrical reveal highlights how the 9-3 dot structure turns into a charming and eye-catching birds kolam. If you enjoy festive themed grids, explore other formats like 7-4 and 11-6 to expand your Dussehra rangoli collection.
Save this design and recreate it to brighten your celebration beautifully.
Tip: A slightly damp brush along the edges gives a sharper finish, especially for festival photographs.
The 9 to 3 dots muggulu is a delightful choice for Dussehra, a festival that celebrates victory and positivity. This design features a compact decreasing grid that allows for the creation of charming bird shapes, making it both easy and visually appealing for beginners. The symmetrical layout not only enhances the festive spirit but also invites good vibes into your home. By following the structured dot placement, you can achieve a clean and elegant look that beautifully complements your entrance. If you’re looking for more inspiration, check out our Trendy Creative Kolam Designs.
This rangoli design is particularly well-suited for small to medium entrances, ensuring that your festive decor remains neat and inviting. The 9 to 3 dots format facilitates a balance of detail and simplicity, allowing you to express creativity without overwhelming complexity. As you enjoy this artistic endeavor, remember that rangoli is not just a decorative art but a way to welcome guests and share joy. For further exploration of similar styles, consider our Festival Flower Rangoli With 9×9 post. Learn more about the significance and history of this beautiful tradition by visiting this page.
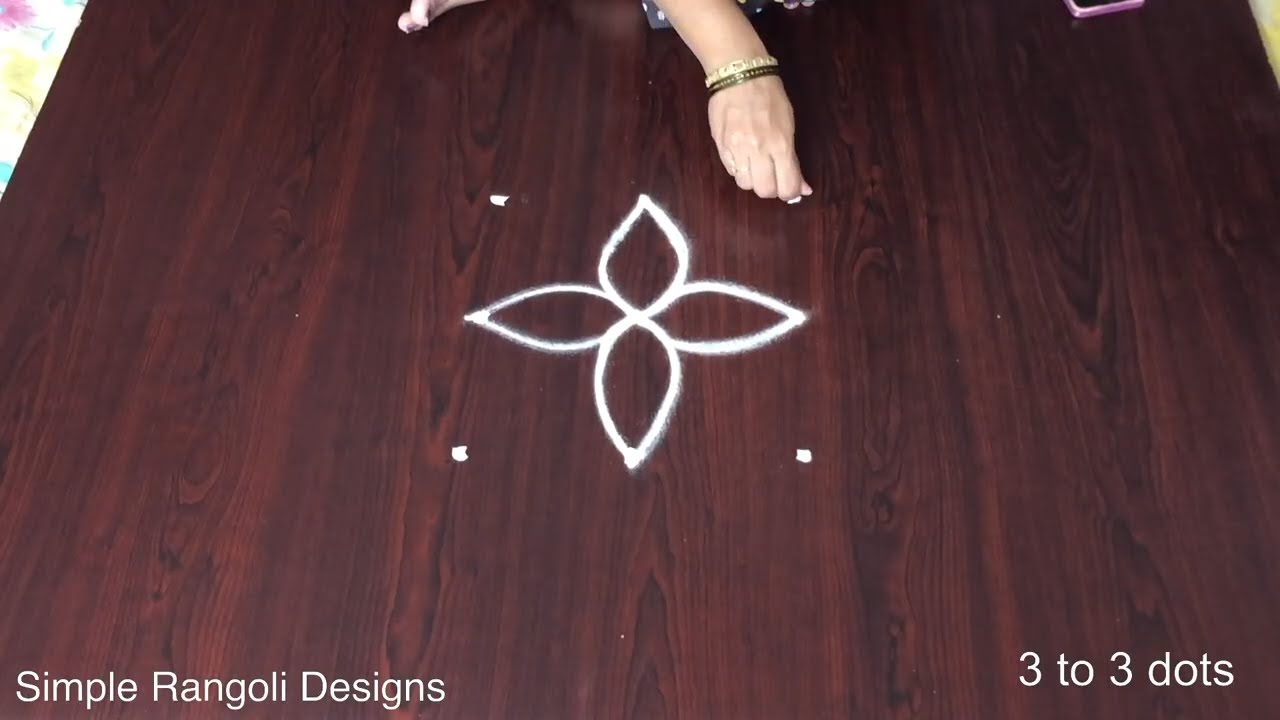
9 To 3 Dots — Step by Step Guide
Pace yourself through the steps — kolam rewards patience more than speed.
- Clear a flat surface and set down your dot grid using rice flour or chalk.
- Confirm the dot spacing is even — uneven dots are the biggest cause of wobbly curves.
- Begin tracing from the centre outward, following the curves shown in the video above.
- Fill the petals and sections with your chosen colours, working one area at a time.
- Finish the edges with a fine line for a sharp, photograph-ready result.
What You Will Learn
- 9-3 Dots Birds Kolam
- Dussehra Special Rangoli 9-3
- Beautiful Bird Muggulu 9-3
- 9-3 Dots Kolam Design
- Festive Bird Rangoli 9-3
- 9-3 Pulli Kolam
Frequently Asked Questions
How do I draw this rangoli?
Begin with the dot grid — this is the skeleton of the design. With rice flour or chalk, place each dot at equal intervals. Then trace the curves slowly, one section at a time.
Is this suitable for beginners?
Absolutely. You can pause and rewind the video at every step. The pattern is straightforward once you have the grid down.
What materials do I need?
Powder (white for outlines, colours for filling), a flat surface, and a dot stencil if you want absolute precision. Beyond that, just your hand and a steady pace.
How long does it take?
About 5 min 15 sec on screen, perhaps 15 minutes for a relaxed first attempt. By the second try most people are noticeably quicker.
When you draw this, focus on the first three dots — get those right and the whole pattern follows. The rest is just patience and a steady hand.


Leave a Reply