
Friday Padi Diya Kolam is a beautiful kolam pattern you can draw right at your doorstep — perfect for beginners and seasoned rangoli artists alike.
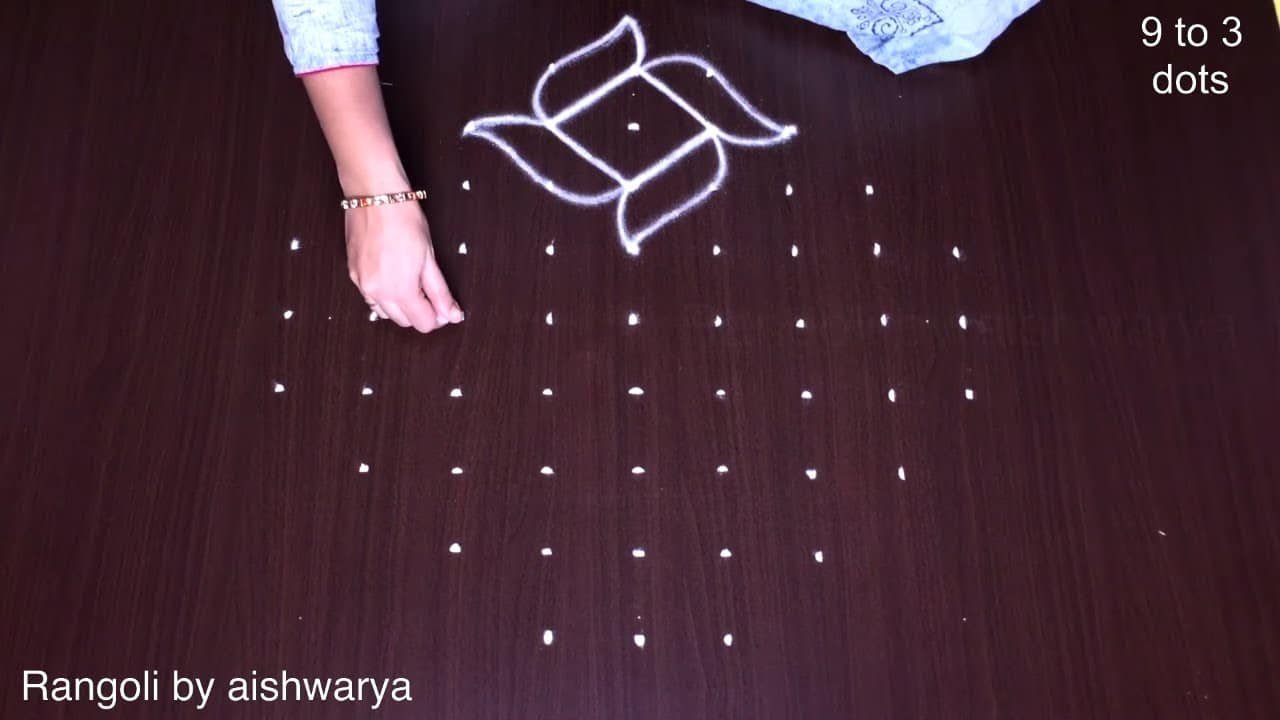
Most Vibrant Friday Padi Diya Kolam 9×3 | Easy Muggulu Traditional Lotus Rangoli Thank you so much for watching Channel
My Rangoli Channel Contains : Rangoli Designs Sankranthi Muggulu
Diwali Rangoli Ratham Muggulu Kolam Designs
Muggulu Designs Chukkala Muggulu Easy Rangoli
Simple Rangoli Easy Rangoli Designs Dhanurmasam Muggulu
Melikala Muggulu Geethala Muggulu Sivarathri Muggulu
Tip: Practice on paper first if you are new to dot kolam. The grid is the same; only the surface changes.
The Friday Padi Diya Kolam, featuring a charming design based on a 9×3 dot grid, is a wonderful way to welcome the weekend with vibrant artistry. Traditionally created on Fridays, this kolam often incorporates elements like lotus patterns and diyas, symbolizing light and prosperity. The use of simple geometric shapes makes it an excellent choice for beginners who are looking to practice their kolam skills while celebrating the spirit of the day. For more inspiration, you can explore Occasional Kolam Designs that can enhance your festivities.
This design not only showcases cultural significance but also allows for creative expression through color and pattern. The Friday Padi Diya Kolam is often adorned with bright colors and intricate details, reflecting the joyous atmosphere associated with festivals. It serves as a beautiful decoration at the entrance of homes, inviting positive energy. If you enjoy this style, you might want to check out the Birds Kolam Design Simple Steps for another delightful project. To learn more about the art of rangoli, visit this Wikipedia page.
Friday Padi Diya Kolam — Step by Step Guide
These steps are written for absolute beginners. Watch once, draw once, then watch again — that is how the pattern locks in.
- Mark the 9-to-3 dot grid — rows tapering from 9 down to 3.
- In the centre draw a small four-petal flower/butterfly motif with a dotted middle.
- At the top centre and bottom centre draw a lotus with pointed petals, and set a small diya (lamp with a flame) resting on the lower lotus.
- On the left and right draw ornate leaf-fan flowers — long curved petals with a spiral 'eye' and a row of dots along each.
- At the four diagonal positions draw small five-petal flowers with dotted centres.
- Add curved leaf/hand brackets cradling the bottom diya and small buds above the top lotus to finish the symmetric layout.
- Retrace the lotus petals, diya and leaf-fans with a clean second stroke for even white lines.
What You Will Learn
- 9X3 Dots Rangoli
- Friday Padi Kolam With Dots
- Lotus Rangoli With Dots
- Diya Kolam Designs
- 9X3 Dots Kolam
- Traditional Friday Muggulu
Frequently Asked Questions
How do I draw this rangoli?
The grid comes first. Use a soft chalk to dot the surface, count twice to confirm the spacing, then start connecting them following the video. Work from the centre outward.
Is this suitable for beginners?
It is one of the more forgiving designs in our collection. Beginners often pick it as a confidence-builder before moving on to larger grids.
What materials do I need?
Powder (white for outlines, colours for filling), a flat surface, and a dot stencil if you want absolute precision. Beyond that, just your hand and a steady pace.
How long does it take?
You will see a 8 min 39 sec walkthrough above. Drawing it yourself is usually a 12–18 minute affair, slightly slower the first time.
Try this design tomorrow morning at your doorstep. The compact grid makes it ideal for a daily ritual, not just festival days.

Leave a Reply