Navarathri Special Rangoli With combines tradition with simplicity, making it one of the most rewarding designs to practice at home.
Navarathri Special Rangoli with 9 9 dots | Padi Kolam Pandaga Muggulu Designs Thank you so much for watching Channel
My Rangoli Channel Contains : Rangoli Designs Sankranthi Muggulu
Diwali Rangoli Ratham Muggulu Kolam Designs
Muggulu Designs Chukkala Muggulu Easy Rangoli
Simple Rangoli Easy Rangoli Designs Dhanurmasam Muggulu
Melikala Muggulu Geethala Muggulu Sivarathri Muggulu
Tip: Use chalk to lightly mark your dot grid first — it wipes away cleanly once your rangoli is finished.
This Navarathri special rangoli design featuring 9 dots is a delightful way to celebrate the festival. The 9-dot pattern provides a solid foundation to create intricate designs that symbolize the nine forms of Goddess Durga. During this auspicious time, families often adorn their homes with beautiful rangoli, enhancing the festive spirit. For those interested in more designs, the Pandaga Muggulu Beautiful Deepam showcases another vibrant approach to festive decorations.
The beauty of this rangoli lies in its simplicity and elegance, making it perfect for beginners. As you create this design, you may choose to incorporate traditional motifs or modern elements, allowing for personal expression. This versatility is a hallmark of rangoli art and can be seen in various styles, such as the Sankranthi Pedha Chukkala Muggulu. For more information about the history and significance of rangoli, you can visit this Wikipedia page.
Navarathri Special Rangoli — Step by Step Guide
Follow the steps below to recreate this design at home. Pause the video whenever you need — there is no hurry.
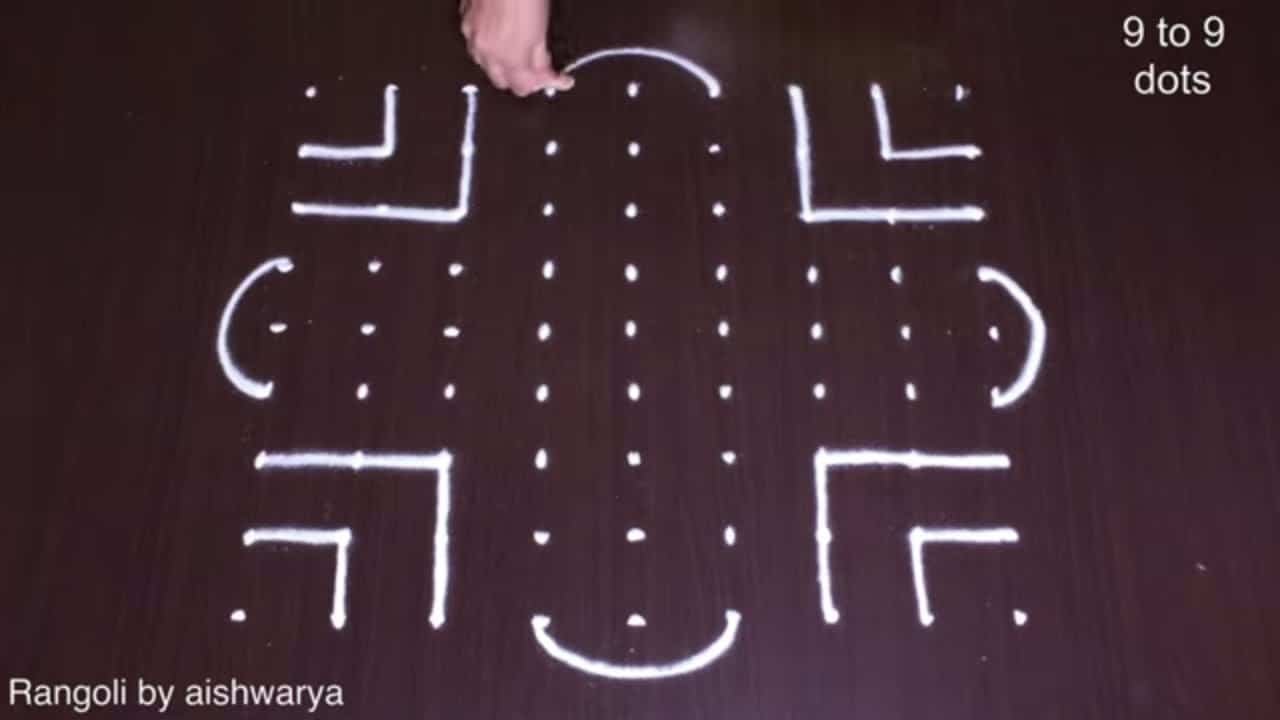
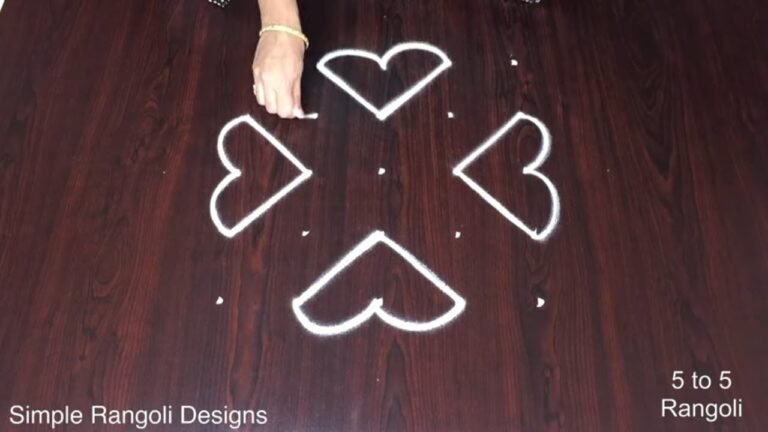
- Mark the 9-to-9 dot grid (a straight 9×9 square of dots).
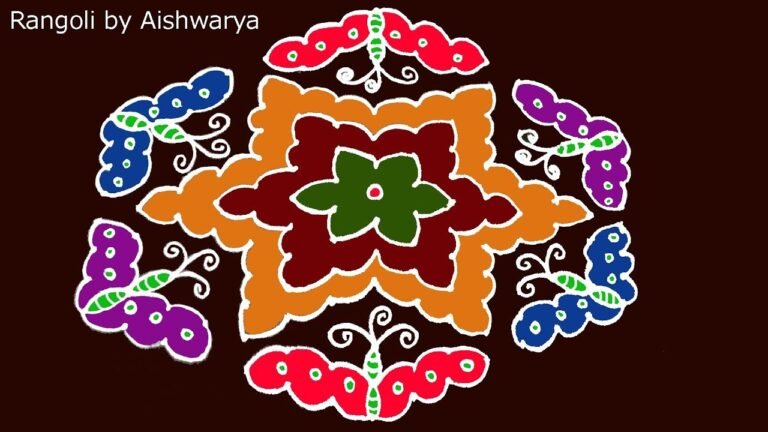
- Draw the centre motif: a small four-petal flower with a dot in the middle, enclosed in a pointed oval (eye) frame.
- Around the centre draw four square panels, one to each diagonal, and fill each with fine cross-hatching (net fill) so they form a larger pinwheel diamond around the flower.
- Draw the top and bottom crowns: at top-centre and bottom-centre make a wide curved lotus/crown shape with a small V-notch and a couple of little buds above it.
- Draw the left and right motifs: an outward-pointing chevron/leaf (arrow) at each side, mirroring left and right.
- Draw the four corner motifs: a small square at each corner with a short leaf sprig curling toward the centre.
- Check symmetry all four ways and fill the lines with white powder, leaving the hatched diamonds lightly netted rather than solid.
What You Will Learn
- Simple Rangoli Designs
- Rangoli
- Muggulu
- Rangoli Designs
- Rangoli Kolam
- Kolam
Frequently Asked Questions
How do I draw this rangoli?
Set down the dot grid in pencil or chalk, then follow the loops one petal at a time. If a curve goes off, wipe it and retry — kolam is forgiving.
Is this suitable for beginners?
Beginner-friendly is exactly the right description. The video walks through every line clearly and you can match the pace.
What materials do I need?
White rice flour for the outline, coloured powders for the fill, and a clean dry floor. That is the essentials list — you can add a stencil if you prefer.
How long does it take?
The video runs 3 min 38 sec. In practice, most learners take between 10 and 20 minutes — a little longer the first time, faster as the pattern becomes familiar.
We rotate festival designs through the year — bookmark the homepage and you will find a new pattern every morning.

Leave a Reply