Amazing Art Rangoli Kolam has become a favourite among learners on our channel — and once you try it, you will see why.
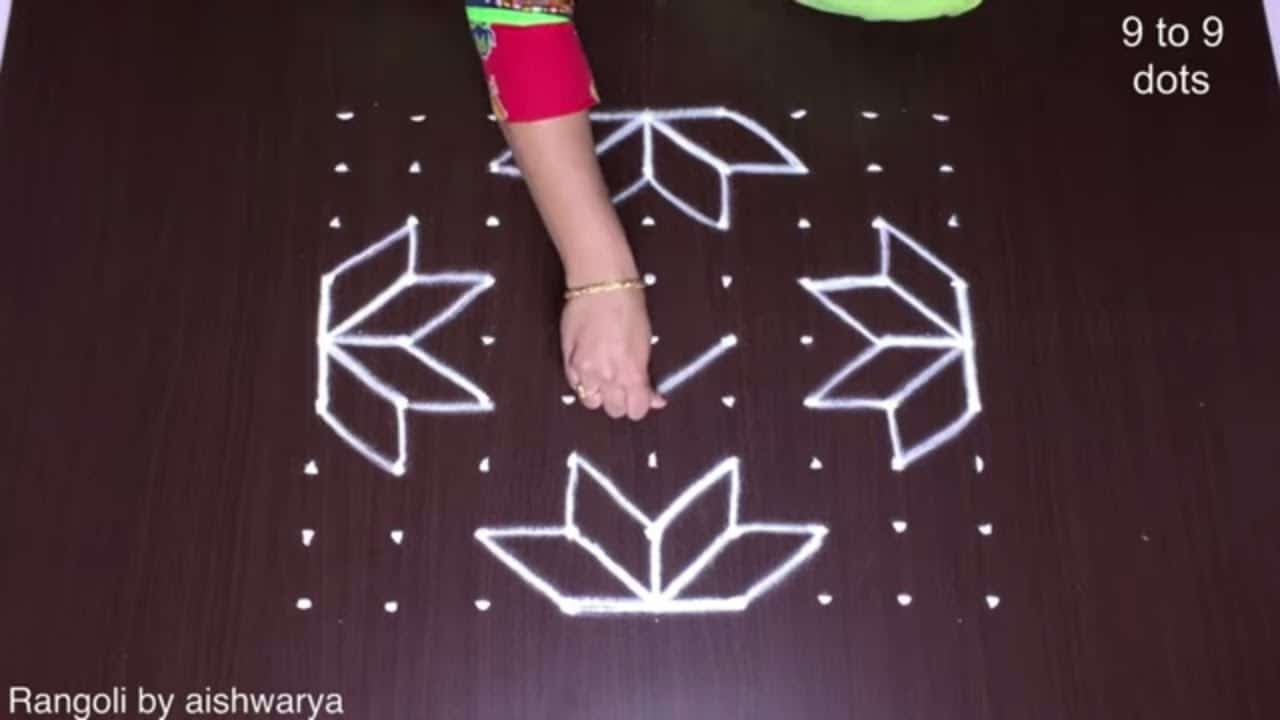
Amazing Art rangoli kolam designs for DEEPAWALI | 9-9dots Latest easy & simple muggulu | RamRangoli Thank you so much for watching Channel
My Ram Rangoli Channel Contains : Rangoli Designs Sankranthi Muggulu
Diwali Rangoli Ratham Muggulu Kolam Designs
Muggulu Designs Chukkala Muggulu Easy Rangoli
Simple Rangoli Easy Rangoli Designs Dhanurmasam Muggulu
Melikala Muggulu Geethala Muggulu Sivarathri Muggulu
Tip: Use chalk to lightly mark your dot grid first — it wipes away cleanly once your rangoli is finished.
The amazing art rangoli kolam, featuring a 9 by 9 dot grid, is a vibrant and intricate design perfect for the celebration of Diwali. This festive period is a time for creating beautiful patterns that not only enhance the beauty of homes but also invite prosperity and joy. The design typically combines curves and straight lines, making it accessible for beginners who wish to try their hand at this traditional art form. For those interested in exploring other designs, you might enjoy the 8-8 Dots Simple Rangoli Designs as well.
Incorporating bright colors and geometric shapes, the amazing art rangoli kolam can be adapted in various ways to reflect personal style. As you create this kolam, consider adding elements like flowers or lamps to enhance its festive appeal. This design not only showcases your artistic flair but also serves as a beautiful welcome for guests during celebrations. If you’re keen on exploring similar kolam styles, the Draw Beautiful Deepam Deepala Simple Kolam can offer additional inspiration. For more information about this traditional art, check out Rangoli.
Amazing Art Rangoli Kolam — Step by Step Guide
Pace yourself through the steps — kolam rewards patience more than speed.
- Mark the 9-to-9 square dot grid.
- In the centre draw an interlocking square/diamond knot, curving two overlapping shapes around the middle dots into a small pinwheel.
- Around the centre draw four sharp pointed leaf-blades, each with a central spine and short parallel hatch-lines inside, arranged like a spinning windmill.
- At each of the four corners draw a flower of pointed petals filled with parallel vein lines (hatched-net petals).
- Run straight lattice lines along the dot rows to connect the corner flowers to the centre, framing the whole design in a square.
- Add small buds or curls in the gaps along the edges to fill (plain white kolam, no colour).
What You Will Learn
- Simple Rangoli Designs
- Rangoli
- Muggulu
- Rangoli Designs
- Rangoli Kolam
- Kolam
Frequently Asked Questions
How do I draw this rangoli?
The grid comes first. Use a soft chalk to dot the surface, count twice to confirm the spacing, then start connecting them following the video. Work from the centre outward.
Is this suitable for beginners?
Absolutely. You can pause and rewind the video at every step. The pattern is straightforward once you have the grid down.
What materials do I need?
You will need rice flour or rangoli powder (white, plus your choice of colours), a flat surface like a clean floor or courtyard, and optionally a dot stencil if you are new to grid-drawing.
How long does it take?
Roughly 4 min 48 sec to watch end-to-end, and 10–20 minutes to draw yourself depending on grid size and how careful you are with the curves.
This is one of those designs that grows on you. The first attempt is for learning; the second is for muscle memory; the third is when it starts to feel like your own.
Leave a Reply