This designs with 9 dots tutorial walks you through every step from the dot grid to the final pattern.
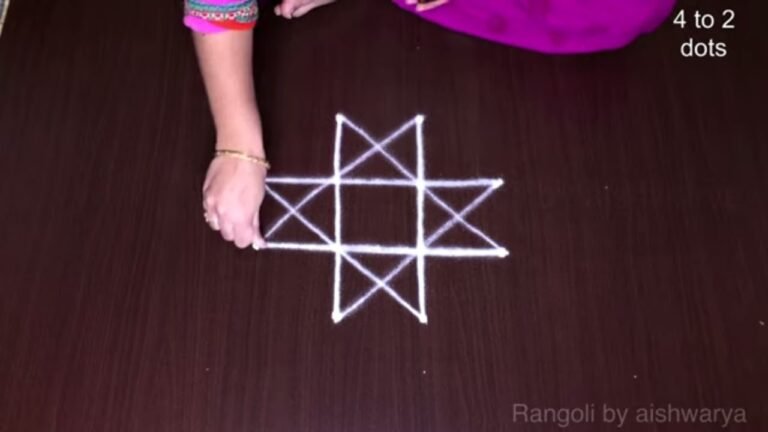
Whether you are decorating for a festival or your daily morning ritual, Beautiful Rangoli Designs With 2 is an excellent design to keep handy.
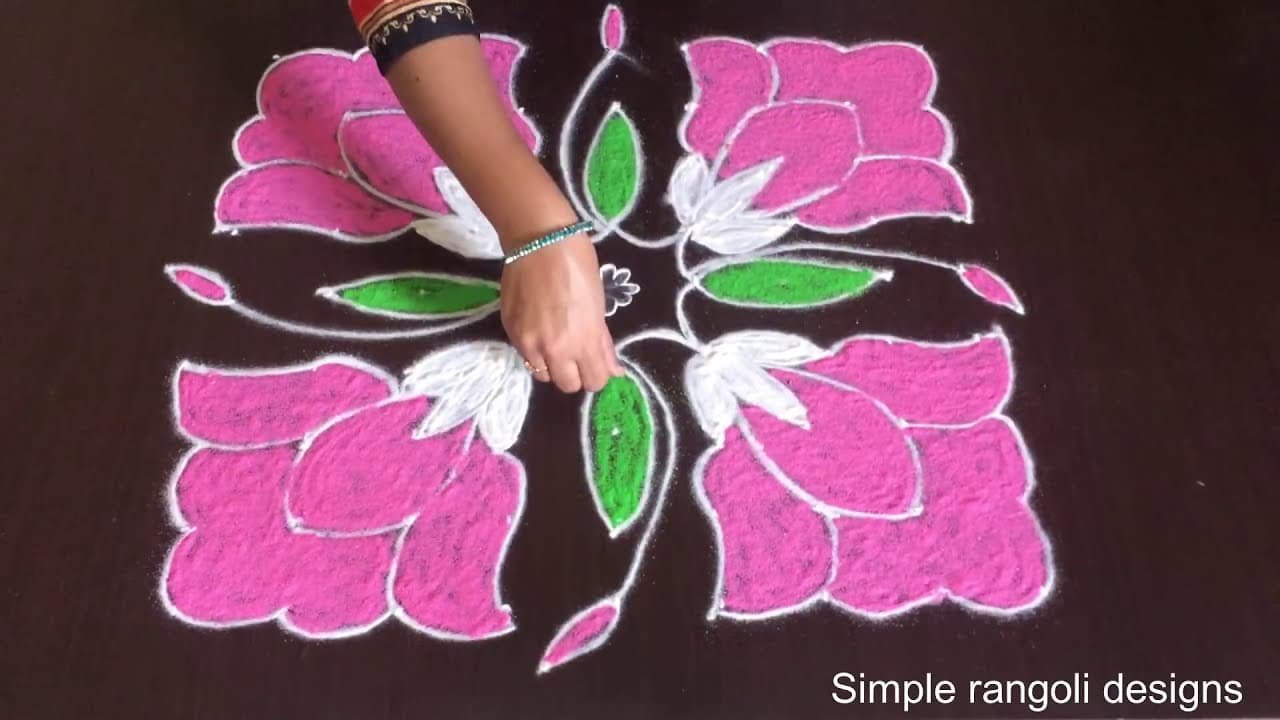
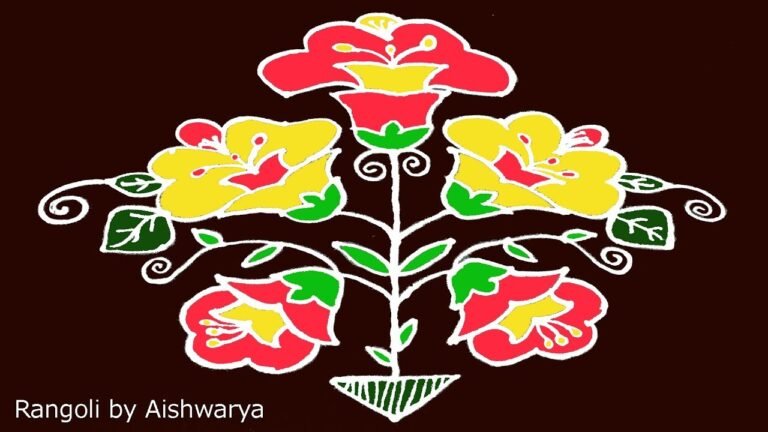
Looking for a neat and creative 9 dots flower kolam that beginners can draw easily? This beautiful floral rangoli design is simple, balanced, and perfect for home entrances. In this video, we create a 9 dots flower kolam, using a clean and centered dot layout that helps maintain symmetry and smooth curves. The 9-dot structure is ideal for beginners because it offers clear spacing and manageable proportions.
🌸 What You’ll Learn Step by Step: Correct placement of the 9-dot base structure Forming symmetrical flower petals with smooth strokes
Maintaining balance across the central axis Simple finishing techniques for a polished look A 9-dot layout is compact yet versatile, making it perfect for apartment entrances and small thresholds. Even though the design looks creative and detailed, the structured dots guide each curve naturally.
This beginner-friendly approach helps improve spacing control and symmetry while keeping the drawing process relaxing and enjoyable. Watch till the end to see the complete floral reveal — the final alignment highlights how simple dots transform into an elegant and creative kolangal pattern. If you enjoy compact floral designs, explore other grids like 7-4 and 5×5 to expand your dot-series collection.
Save this design and recreate it to add charm and freshness to your entrance.
Tip: Practice on paper first if you are new to dot kolam. The grid is the same; only the surface changes.
This beautiful rangoli design with 9 dots showcases a charming floral pattern that is both elegant and easy to create. Ideal for beginners, the structured 9-dot grid ensures that each petal and curve maintains symmetry, making it a perfect choice for home entrances. This design not only enhances the aesthetic appeal of your space but also encourages relaxation and focus while drawing. If you appreciate floral patterns, you might also enjoy the Festival Flower Rangoli With 9×9.
The compact nature of this 9-dot flower kolam makes it versatile enough for smaller spaces, such as apartment entrances. With practice, beginners can learn to balance their strokes and improve their spacing control, leading to more intricate designs in the future. For those interested in expanding their skills, exploring other patterns like the Attractive Simple Kolam Design can provide new ideas and techniques. To learn more about the rich tradition of this art form, visit this page.
About this design: Designs With 9 Dots is a beginner-friendly pattern that comes together in just a few minutes. Once you have practised the designs with 9 dots dot grid, you can scale it up for festival mornings or scale it down for a daily doorstep. Many learners on our channel make this designs with 9 dots their go-to design once they get the rhythm of the curves.
Designs With 9 Dots — Step by Step Guide
Follow the steps below to recreate this design at home. Pause the video whenever you need — there is no hurry.
- Clear a flat surface and set down your dot grid using rice flour or chalk.
- Confirm the dot spacing is even — uneven dots are the biggest cause of wobbly curves.
- Begin tracing from the centre outward, following the curves shown in the video above.
- Fill the petals and sections with your chosen colours, working one area at a time.
- Finish the edges with a fine line for a sharp, photograph-ready result.
What You Will Learn
- 9 Dots Flower Kolam
- Beginner Friendly 9 Dot Rangoli
- Creative Floral Muggulu 9 Dots
- 9 Dot Kolam Design
- Simple Flower Rangoli 9 Dots
- 9 Pulli Kolam Pattern
Frequently Asked Questions
How do I draw this rangoli?
It looks complex but follows a simple rhythm: dots first, then loops. Mark the grid, take a breath, and trace the curves at a steady pace. The pattern emerges on its own.
Is this suitable for beginners?
Yes, and it is one we recommend to first-timers. The small grid keeps the design manageable while still teaching the core technique.
What materials do I need?
Rice flour, coloured rangoli powders, and a clean stretch of floor or paper. Some draw with chalk first to set the grid before powdering over it.
How long does it take?
The tutorial is 2 min 58 sec long. With practice the actual drawing settles around 10 minutes; the first time will likely take twice that.
Roll up your sleeves, grab a handful of rice flour, and give this design ten quiet minutes. The result is worth the small effort.

Leave a Reply