If you enjoy dot-grid muggulu, Ugadi Rangula Muggulu is a satisfying pattern that comes together in just a few minutes.

Ugadi Rangula Muggulu Simple | 10-2 Ugadi Rangoli With Dots & Colours Thank you so much for watching Channel
My Rangoli Channel Contains : Rangoli Designs Sankranthi Muggulu
Diwali Rangoli Ratham Muggulu Kolam Designs
Muggulu Designs Chukkala Muggulu Easy Rangoli
Simple Rangoli Easy Rangoli Designs Dhanurmasam Muggulu
Melikala Muggulu Geethala Muggulu Sivarathri Muggulu
Tip: Practice on paper first if you are new to dot kolam. The grid is the same; only the surface changes.
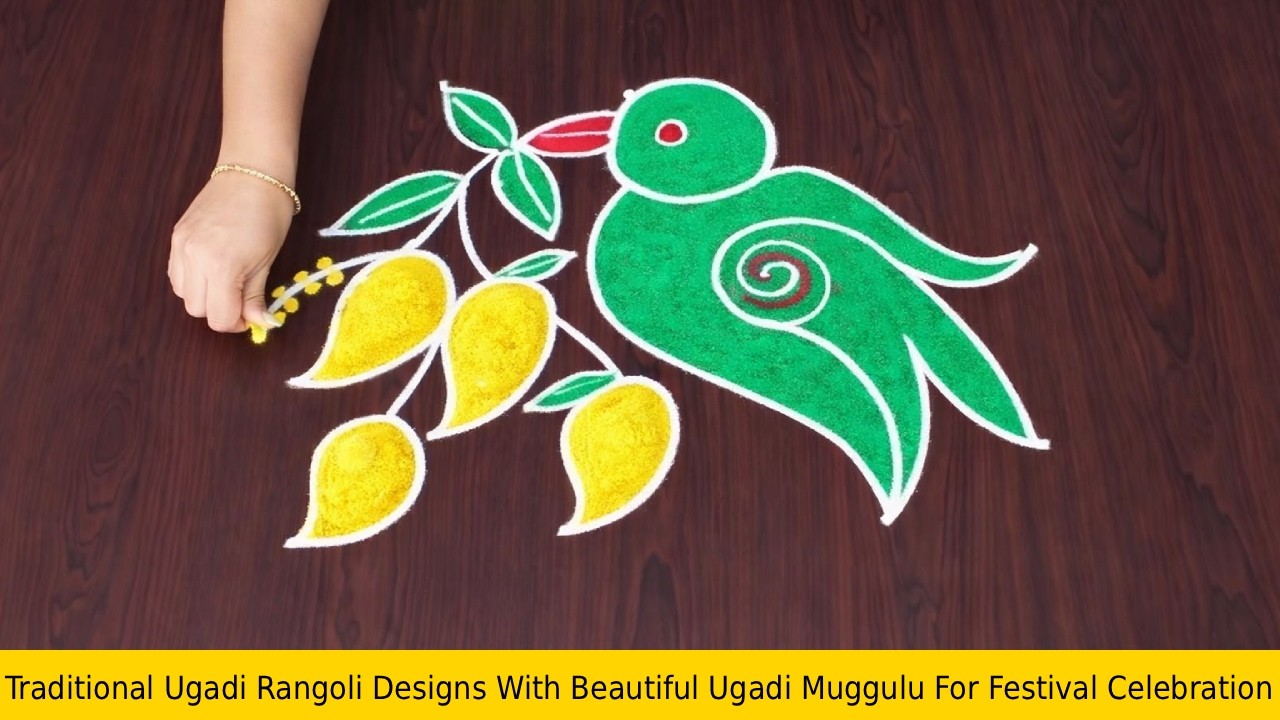
Ugadi Rangula Muggulu is a beautiful and traditional design crafted with 10 to 2 dots, perfect for celebrating the Ugadi festival. This rangoli design symbolizes new beginnings and prosperity, making it an ideal choice for welcoming the New Year. The simplicity of the design allows beginners to easily replicate it, while still offering opportunities for creativity through color choices. For those interested in exploring more easy and beautiful designs, check out our How to Draw 12×2 Deepam Rangoli Designs.
During Ugadi, families often adorn their homes with these vibrant muggulu to invite positivity and good fortune. The patterns can be enhanced with colorful powders or flowers, creating a cheerful atmosphere. Engaging in this art form not only fosters creativity but also strengthens family bonds as everyone comes together to create their unique designs. To further inspire your rangoli journey, you might enjoy our collection of Very Easy Super Flower Poo Kolams Muggulu. For more information about the cultural significance of rangoli, visit this page.
Ugadi Rangula Muggulu — Step by Step Guide
If you have drawn dot rangoli before, this will feel familiar. If you have not, the dot grid will guide you.
- Clear a flat surface and set down your dot grid using rice flour or chalk.
- Confirm the dot spacing is even — uneven dots are the biggest cause of wobbly curves.
- Begin tracing from the centre outward, following the curves shown in the video above.
- Fill the petals and sections with your chosen colours, working one area at a time.
- Finish the edges with a fine line for a sharp, photograph-ready result.
What You Will Learn
- Ugadi Rangoli With Dots
- Ugadi Rangoli Side Designs
- Ugadi Rangoli Simple
- Ugadi Rangoli Easy
- Rangoli Ugadi Special
- Ugadi Rangoli Designs With Dots
Frequently Asked Questions
How do I draw this rangoli?
Begin with the dot grid — this is the skeleton of the design. With rice flour or chalk, place each dot at equal intervals. Then trace the curves slowly, one section at a time.
Is this suitable for beginners?
Absolutely. You can pause and rewind the video at every step. The pattern is straightforward once you have the grid down.
What materials do I need?
Rice flour, coloured rangoli powders, and a clean stretch of floor or paper. Some draw with chalk first to set the grid before powdering over it.
How long does it take?
3 min 52 sec of video, perhaps 20 minutes of practice. The curves take a couple of attempts to feel natural, then it speeds up considerably.
Once this design feels familiar, switch the colours or rotate the grid by a step. Small tweaks keep daily kolam practice interesting.


Leave a Reply