There is something timeless about Easy Five Stars Rangoli — the symmetry, the rhythm of the dots, and the soft curves it produces.
For another beginner-friendly variation, try 5 To 5 Peacock Rangoli For Diwali.
Learn more about the tradition of Rangoli on Wikipedia.
Looking for a neat and structured 12×2 dots rangoli for your entrance? This simple and elegant 12 by 2 dot kolam is perfect for beginners and compact spaces. In this video, I guide you step by step to create a symmetrical 12×2 dots kolam using a straight rectangular grid. If you are searching for 12×2 dots rangoli designs simple, this tutorial will help you understand spacing, alignment, and smooth curve formation.
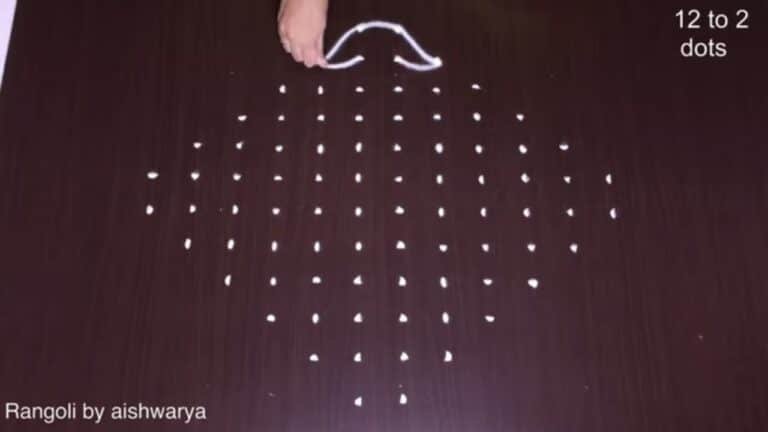
We begin by placing the full 12 into 2 muggulu dot layout carefully to form a strong foundation. Then the framework develops gradually into a clean and balanced pattern. This method makes it easy to recreate beautiful 12×2 dots rangoli designs with dots without confusion. How to construct a proper 12-2 dots kolam grid How to create balanced 12 2 muggulu step by step
How to refine curves in 12 x 2 chukkala muggulu How to draw neat 12 chukkala muggulu with dots This layout is ideal for those searching for rangoli designs 12 to 2 dots or compact straight-grid kolams. You can also adapt it into creative patterns like a five star kolam by modifying the inner structure.
Whether you search for 12-2 rangoli, 12*2 chukkala muggulu, or traditional rectangular dot kolams, this structured design helps you recreate it confidently. The straight grid makes it one of the most beginner-friendly dot layouts. Watch till the end to see how the complete 12×2 grid transforms into a clean and symmetrical rangoli. If you enjoy straight-line dot kolams, explore more structured dot kolam tutorials on the channel.
Tip: Practice on paper first if you are new to dot kolam. The grid is the same; only the surface changes.
About this design: Easy Five Stars Rangoli is a beginner-friendly pattern that comes together in just a few minutes. Once you have practised the easy five stars rangoli dot grid, you can scale it up for festival mornings or scale it down for a daily doorstep. Many learners on our channel make this easy five stars rangoli their go-to design once they get the rhythm of the curves.
Easy Five Stars Rangoli — Step by Step Guide
These steps are written for absolute beginners. Watch once, draw once, then watch again — that is how the pattern locks in.
- Mark the 12-to-2 dot grid.
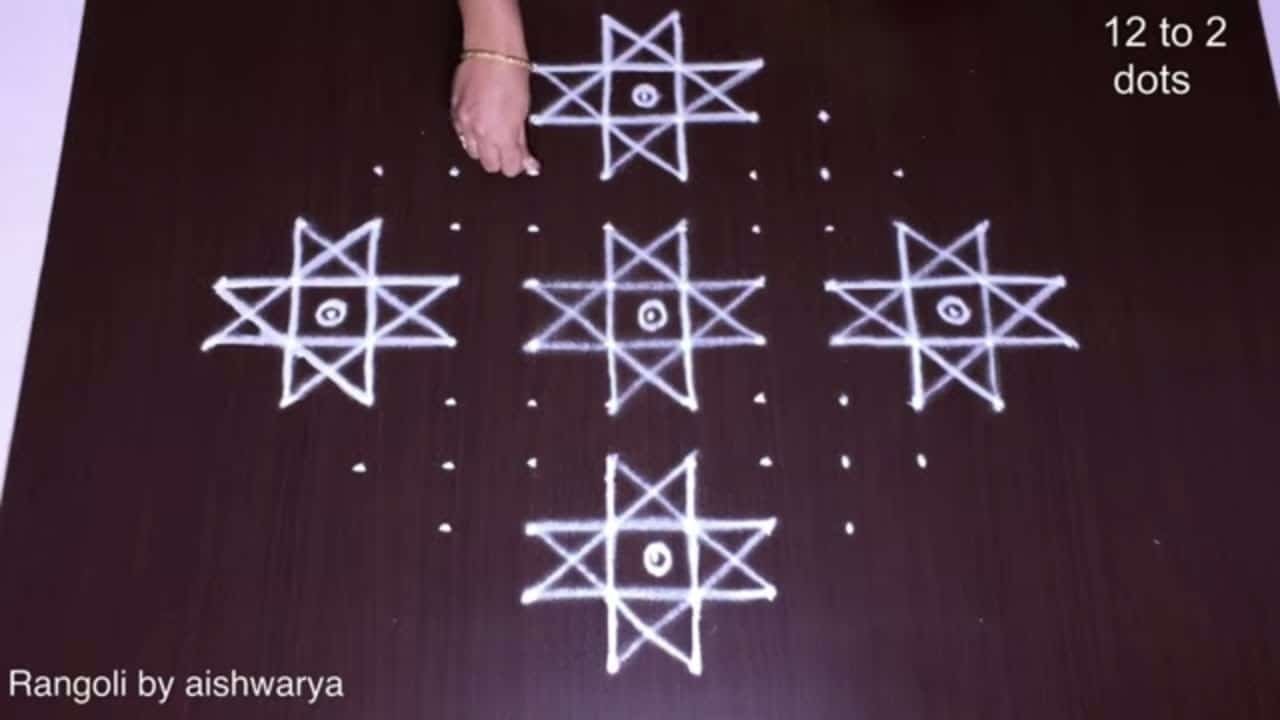
- Draw an eight-pointed star in the centre — two overlapping squares — with a dot in the middle.
- Draw four more eight-pointed stars, one above, below, left and right of the centre.
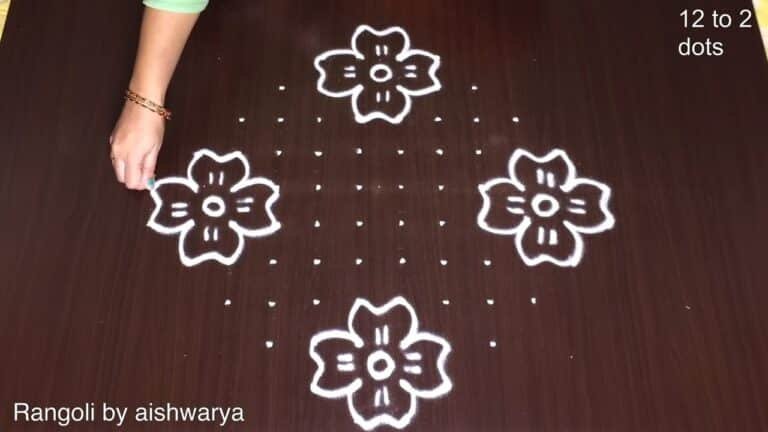
- In each diagonal gap between the stars, draw a paisley leaf with a curl and a dotted fill.
- Keep the five stars aligned in a plus and everything symmetric.
- Outline in white and colour.
What You Will Learn
- 12X2 Dots Rangoli
- 12X2 Dots Kolam
- 12X2 Dots Rangoli Designs
- 12X2 Dots Rangoli Designs Simple
- 12X2 Dots Rangoli Simple Designs
- Rangoli Designs 12 Dots
Frequently Asked Questions
How do I draw this rangoli?
Set down the dot grid in pencil or chalk, then follow the loops one petal at a time. If a curve goes off, wipe it and retry — kolam is forgiving.
Is this suitable for beginners?
Absolutely. You can pause and rewind the video at every step. The pattern is straightforward once you have the grid down.
What materials do I need?
You will need rice flour or rangoli powder (white, plus your choice of colours), a flat surface like a clean floor or courtyard, and optionally a dot stencil if you are new to grid-drawing.
How long does it take?
4 min 17 sec of video, perhaps 20 minutes of practice. The curves take a couple of attempts to feel natural, then it speeds up considerably.
We rotate festival designs through the year — bookmark the homepage and you will find a new pattern every morning.
Leave a Reply