There is something timeless about Dot Kolam Designs Kartik — the symmetry, the rhythm of the dots, and the soft curves it produces.
Dot Kolam Designs | Kartik Maas Special Rangoli | Manchi Muggulu. This tutorial will show you how to draw Beautiful Indian traditional art sankranthi muggulu patterns using materials such as dry rice flour, colored sand or flower petals Rangoli designs by Aishwarya. Simple rangoli designs with dots Kolam pattern is created on the floor in living rooms or courtyards. Draw the Lines step by step as it is shown in this video and will be awesome Rangoli Design. 😲 The rangoli design for diwali pattern here is one of the amazing latest simple kolam designs. Simple Rangoli Designs and easy rangoli designs by Aishwarya with dots for beginners and intermediate.
1. Diwali Rangoli 2. Pongal kolams 3. Easy rangoli designs
4. Rangoli design 5. Chukkala muggulu 6. Muggu designs
7. Rangoli for diwali 8. Rangoli Simple 9. Chukkala muggulu sankranthi
10. Kolam designs 11. Simple rangoli design 12. Muggulu designs
13. Navaratri pooja kolam 14. Puratasi madham kolam 15. Simple sankranthi muggulu
Tip: Work from the centre outward. It keeps the symmetry honest and prevents the design from drifting off-balance.
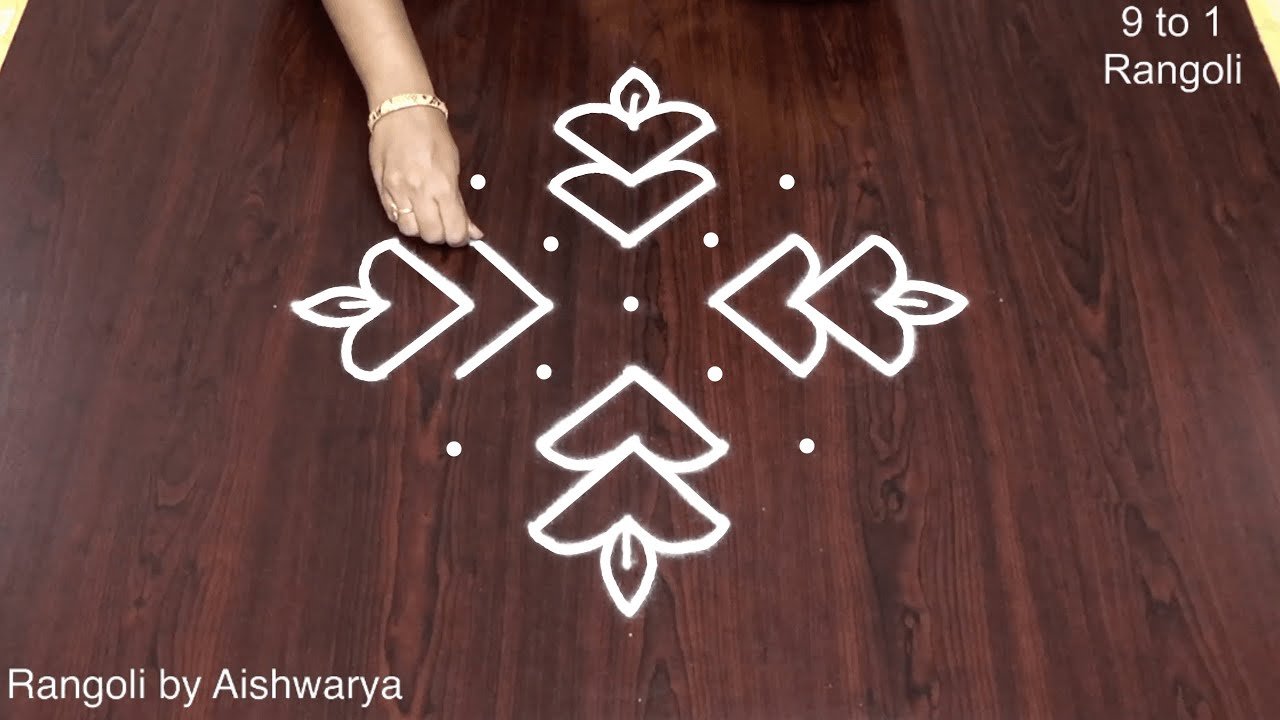
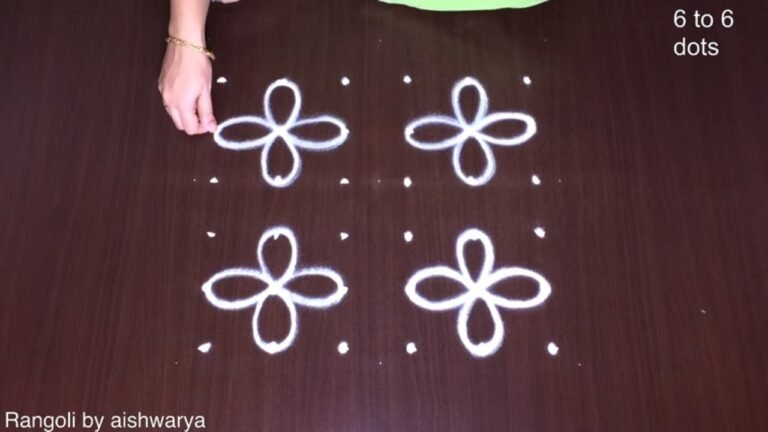
The dot kolam designs for Kartik Maas often reflect the beauty of the season, incorporating traditional patterns that can be both simple and intricate. These designs typically use a grid of 9 to 1 dots, allowing for a variety of creative expressions suitable for beginners. The use of rice flour or colored powders enhances the visual appeal, making them perfect for festive occasions. For more inspiration, you might explore Easy Rangoli Designs for Diwali With 5 to 5 Dots that also celebrate the spirit of togetherness during festivals.
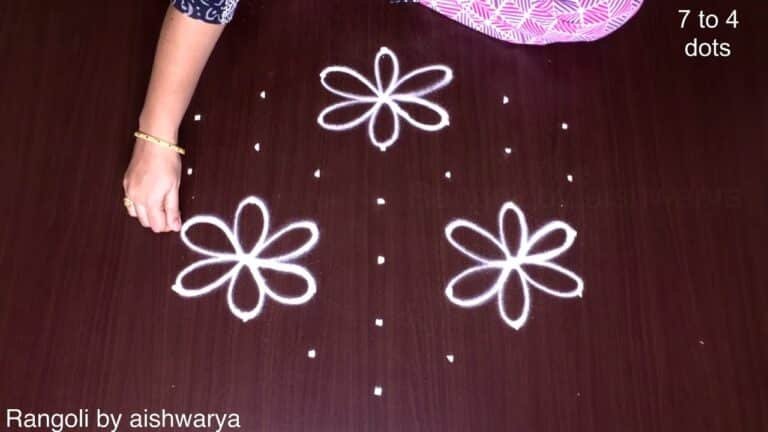
Creating a kolam during Kartik Maas is a wonderful way to welcome guests and bring a festive spirit to your home. The designs can be enhanced with flower petals, a common practice in many regions, adding a natural fragrance and color to the artwork. For those interested in expanding their repertoire, the Latest Flower Rangoli Designs 9 Dots can provide additional ideas that incorporate floral patterns. For a broader understanding of this beautiful art form, consider visiting this Wikipedia page on Rangoli.
About this design: Dot Kolam Designs Kartik is a beginner-friendly pattern that comes together in just a few minutes. Once you have practised the dot kolam designs kartik dot grid, you can scale it up for festival mornings or scale it down for a daily doorstep. Many learners on our channel make this dot kolam designs kartik their go-to design once they get the rhythm of the curves.
Dot Kolam Designs Kartik — Step by Step Guide
These steps are written for absolute beginners. Watch once, draw once, then watch again — that is how the pattern locks in.
- Clear a flat surface and set down your dot grid using rice flour or chalk.
- Confirm the dot spacing is even — uneven dots are the biggest cause of wobbly curves.
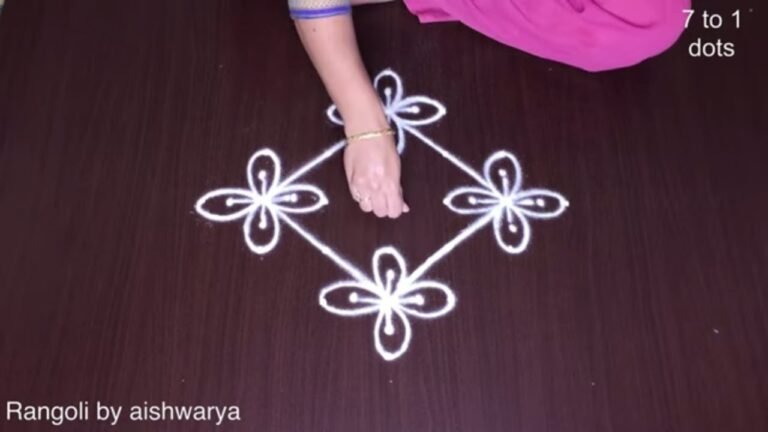
- Begin tracing from the centre outward, following the curves shown in the video above.
- Fill the petals and sections with your chosen colours, working one area at a time.
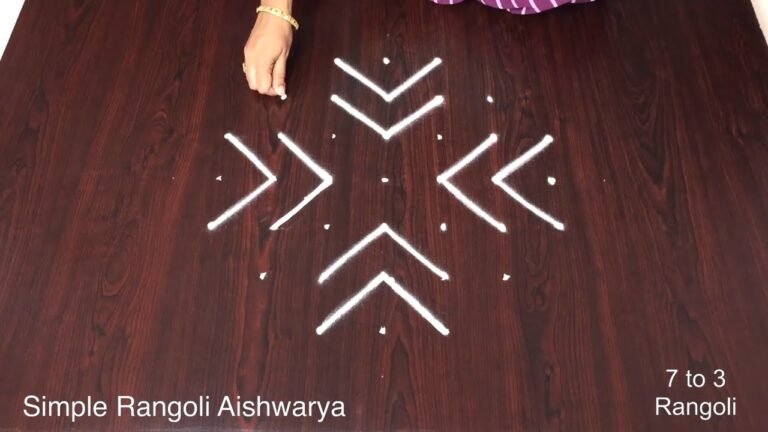
- Finish the edges with a fine line for a sharp, photograph-ready result.
What You Will Learn
- Simple Rangoli Designs
- Rangoli
- Muggulu
- Rangoli Designs
- Rangoli Kolam
- Kolam
Frequently Asked Questions
How do I draw this rangoli?
It looks complex but follows a simple rhythm: dots first, then loops. Mark the grid, take a breath, and trace the curves at a steady pace. The pattern emerges on its own.
Is this suitable for beginners?
Yes, and it is one we recommend to first-timers. The small grid keeps the design manageable while still teaching the core technique.
What materials do I need?
White rice flour for the outline, coloured powders for the fill, and a clean dry floor. That is the essentials list — you can add a stencil if you prefer.
How long does it take?
About 3 min 15 sec on screen, perhaps 15 minutes for a relaxed first attempt. By the second try most people are noticeably quicker.
If you enjoyed this design, browse our other dot-pattern tutorials — they share the same approach and build naturally on the techniques here.
Leave a Reply