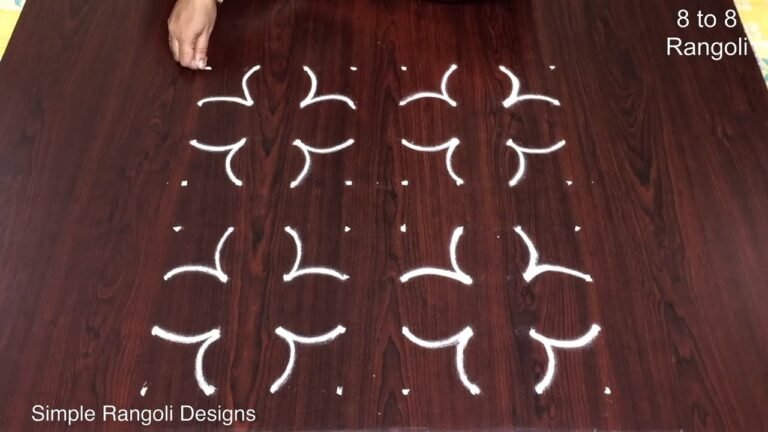
This masam muggulu 8 dots tutorial walks you through every step from the dot grid to the final pattern.
For another beginner-friendly variation, try 16 To 6 Amazing Panduga Pedda Muggulu.
Learn more about the tradition of Rangoli on Wikipedia.
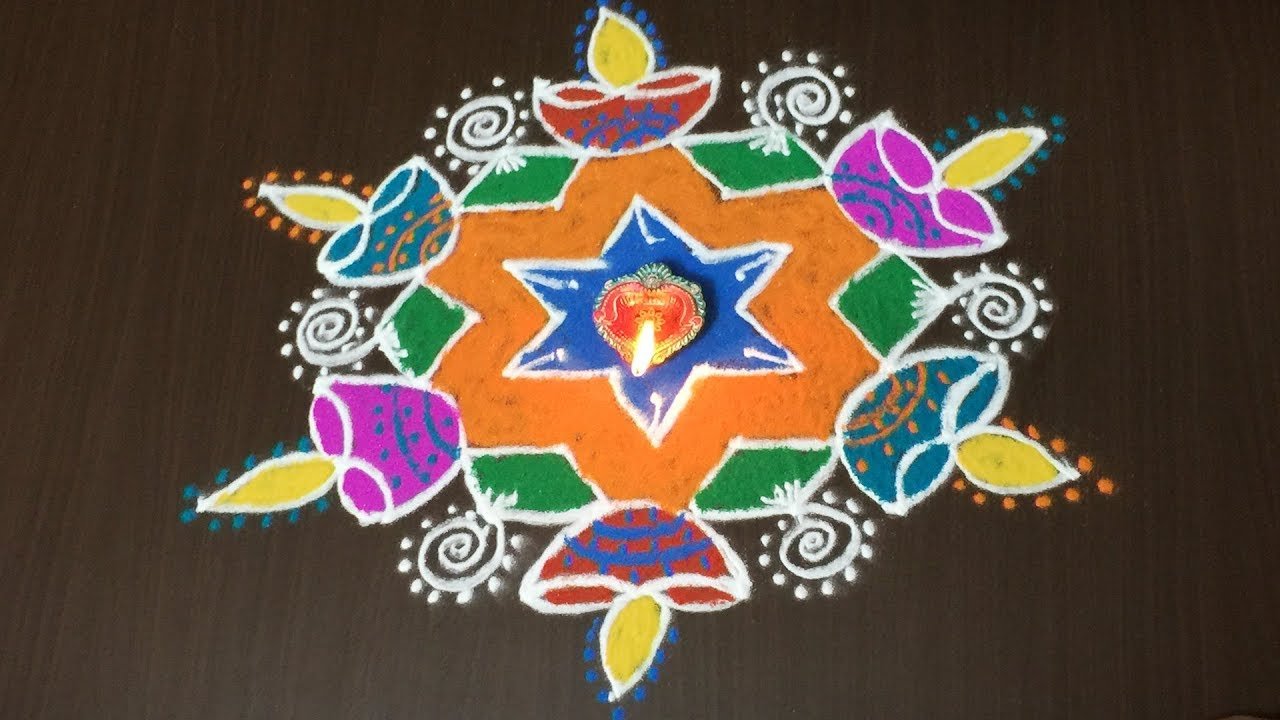
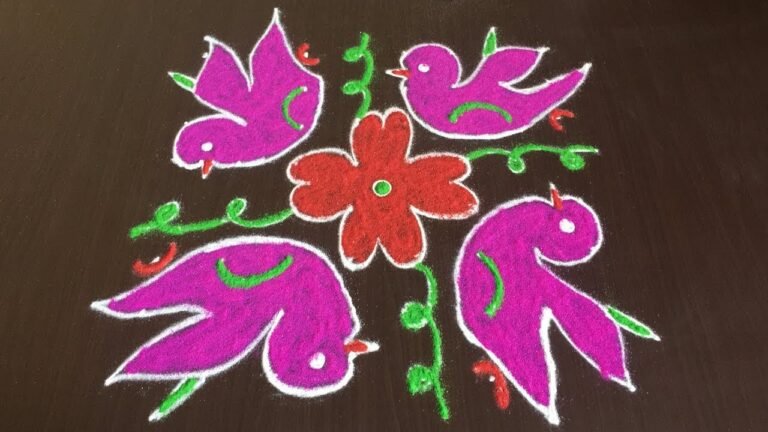
Karthika Masam Muggulu 8 is a beautiful kolam pattern you can draw right at your doorstep — perfect for beginners and seasoned rangoli artists alike.
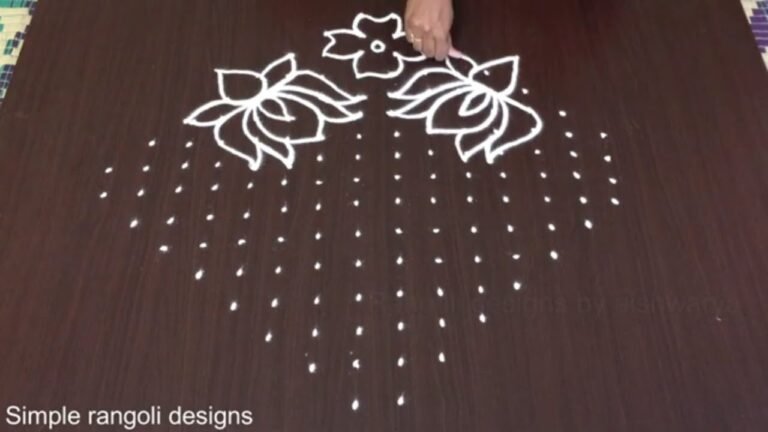
Looking for a simple yet festive kolam for Karthika Masam or Diwali? This 8 dots rangoli design is perfect for creating a bright and traditional entrance decoration. In this video, I show you how to draw a simple 8 dots kolam design step by step. The straight dot structure makes it easy to follow, while the balanced curves and detailing give the rangoli a festive and elegant appearance. This design beautifully fits both Karthika Masam decoration and Diwali celebrations.
We begin by placing a clean 8 straight dots grid, ensuring proper alignment and symmetry. Then, the outer framework is formed smoothly by connecting the surrounding dots. Inner detailing enhances the structure and gives the kolam a neat and complete finish. The simplicity of the layout makes it suitable even for beginners. How to construct a proper 8-dot grid How to convert simple dots into a festive kolam
How to maintain symmetry in medium-sized rangoli Easy finishing tips to enhance the final look This muggulu design works beautifully for pooja areas, home entrances, and festive gatherings. Its structured format ensures a clean result without making the pattern complicated.
Watch till the end to see the full transformation from basic dots to a complete festive rangoli — the final reveal highlights how simple structure creates an eye-catching design. If you enjoy dot-based festival kolams, explore more 8 dots rangoli, Karthika Masam muggulu, and Diwali special designs on the channel.
Tip: A slightly damp brush along the edges gives a sharper finish, especially for festival photographs.
About this design: Masam Muggulu 8 Dots is a beginner-friendly pattern that comes together in just a few minutes. Once you have practised the masam muggulu 8 dots dot grid, you can scale it up for festival mornings or scale it down for a daily doorstep. Many learners on our channel make this masam muggulu 8 dots their go-to design once they get the rhythm of the curves.
Masam Muggulu 8 Dots — Step by Step Guide
Follow the steps below to recreate this design at home. Pause the video whenever you need — there is no hurry.
- Clear a flat surface and set down your dot grid using rice flour or chalk.
- Confirm the dot spacing is even — uneven dots are the biggest cause of wobbly curves.
- Begin tracing from the centre outward, following the curves shown in the video above.
- Fill the petals and sections with your chosen colours, working one area at a time.
- Finish the edges with a fine line for a sharp, photograph-ready result.
What You Will Learn
- Karthika Masam Muggulu 8 Dots
- 8 Dots Rangoli Design
- Simple Diwali Rangoli Kolam
- 8 Dot Grid Kolam
- Karthika Masam Kolam Design
- 8 Chukkala Muggulu
Frequently Asked Questions
How do I draw this rangoli?
The grid comes first. Use a soft chalk to dot the surface, count twice to confirm the spacing, then start connecting them following the video. Work from the centre outward.
Is this suitable for beginners?
Beginner-friendly is exactly the right description. The video walks through every line clearly and you can match the pace.
What materials do I need?
Rice flour, coloured rangoli powders, and a clean stretch of floor or paper. Some draw with chalk first to set the grid before powdering over it.
How long does it take?
You will see a 2 min 52 sec walkthrough above. Drawing it yourself is usually a 12–18 minute affair, slightly slower the first time.
Once you get the rhythm of this design, try scaling it up or experimenting with colours. The grid stays the same; the personality changes.
Leave a Reply