This 11×6 dots diya tutorial walks you through every step from the dot grid to the final pattern.
For another beginner-friendly variation, try Pongal Rangoli Designs.
Learn more about the tradition of Rangoli on Wikipedia.
There is something timeless about 11 6 Dots Diya Kolam — the symmetry, the rhythm of the dots, and the soft curves it produces.
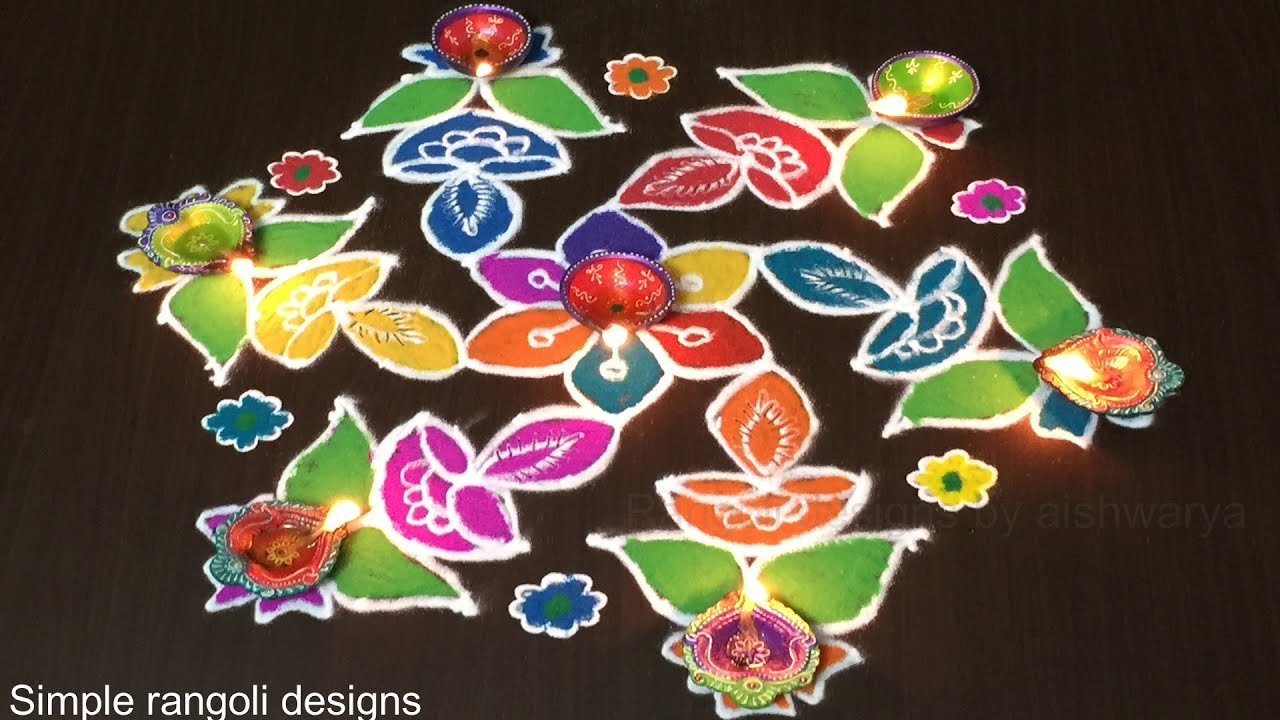
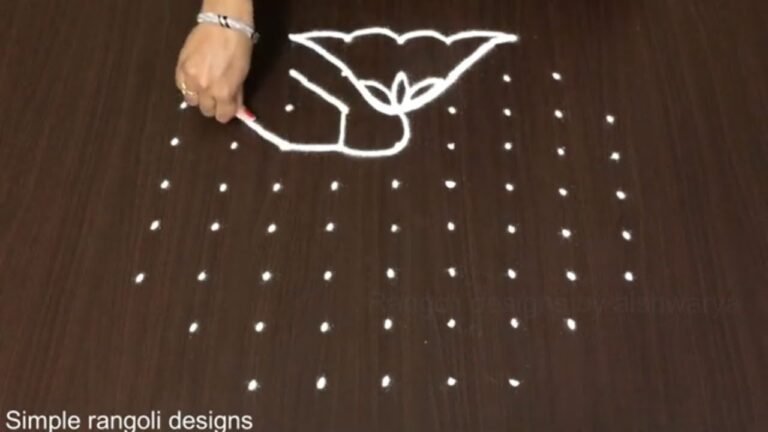
Planning a festive kolam for Deepavali celebrations? This 11 by 6 dots lamp rangoli is a perfect traditional design for special pandagalu decoration. In this video, I guide you step by step to draw a 11×6 rectangular dot grid kolam inspired by classic lamp patterns. The structured chukkala layout ensures symmetry, while the elegant lamp curves give the design a rich festive appearance. This kolam is ideal for Deepavali entrances and pooja areas.
We begin by placing a neat 11 by 6 straight dot structure, making sure the spacing is even for balance. Then, the outer lamp shapes are formed smoothly around the grid. Inner detailing enhances the structure and creates a bold and festive look. Even though the design appears detailed, the step-by-step method makes it easy to follow. How to construct a proper 11–6 dot grid How to shape balanced lamp curves using dots
How to maintain symmetry in rectangular kolams Simple finishing techniques for a festive result This chukkala muggulu design is perfect for Deepavali pandagalu, home entrances, and traditional celebration settings. The symmetrical layout ensures a neat and impressive final pattern.
Watch till the end to see the complete transformation from simple dots to a fully finished festive rangoli — the final reveal highlights a bold and elegant Deepavali kolam. If you enjoy structured dot kolams, explore more 11×6 dots rangoli, festival special muggulu, and traditional celebration designs on the channel.
Tip: Use chalk to lightly mark your dot grid first — it wipes away cleanly once your rangoli is finished.
About this design: 11X6 Dots Diya is a beginner-friendly pattern that comes together in just a few minutes. Once you have practised the 11×6 dots diya dot grid, you can scale it up for festival mornings or scale it down for a daily doorstep. Many learners on our channel make this 11×6 dots diya their go-to design once they get the rhythm of the curves.
11X6 Dots Diya — Step by Step Guide
Below is the step-by-step breakdown. The video covers the same sequence in real time.
- Clear a flat surface and set down your dot grid using rice flour or chalk.
- Confirm the dot spacing is even — uneven dots are the biggest cause of wobbly curves.
- Begin tracing from the centre outward, following the curves shown in the video above.
- Fill the petals and sections with your chosen colours, working one area at a time.
- Finish the edges with a fine line for a sharp, photograph-ready result.
What You Will Learn
- 11 By 6 Dots Rangoli
- 11X6 Dots Kolam Design
- Deepavali Lamp Rangoli
- Chukkala Muggulu 11X6
- Deepavali Special Kolam
- 11 6 Chukkala Muggulu
Frequently Asked Questions
How do I draw this rangoli?
Begin with the dot grid — this is the skeleton of the design. With rice flour or chalk, place each dot at equal intervals. Then trace the curves slowly, one section at a time.
Is this suitable for beginners?
Beginner-friendly is exactly the right description. The video walks through every line clearly and you can match the pace.
What materials do I need?
White rice flour for the outline, coloured powders for the fill, and a clean dry floor. That is the essentials list — you can add a stencil if you prefer.
How long does it take?
Roughly 3 min 34 sec to watch end-to-end, and 10–20 minutes to draw yourself depending on grid size and how careful you are with the curves.
If you draw this and would like a follow-up design at the same skill level, leave a comment on the video — we read every one and queue up requests.


Leave a Reply