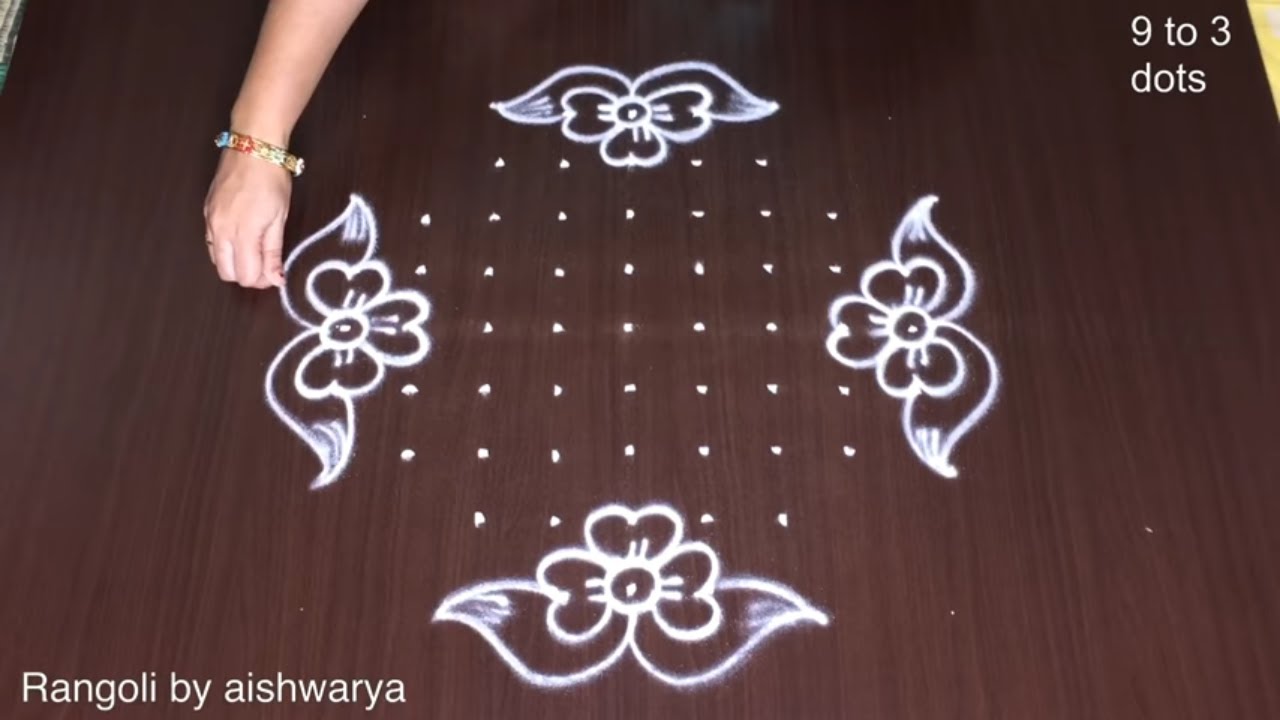
Amazing Four Lotus Rangoli is the kind of design that looks intricate but is genuinely beginner-friendly once you follow the dot grid.

Amazing Four Lotus Rangoli Patterns creative | 8 Into 2 Shapely Kolam Beginners Muggulu | Rangoli Thank you so much for watching Channel
My Rangoli Channel Contains : Rangoli Designs Sankranthi Muggulu
Diwali Rangoli Ratham Muggulu Kolam Designs
Muggulu Designs Chukkala Muggulu Easy Rangoli
Simple Rangoli Easy Rangoli Designs Dhanurmasam Muggulu
Melikala Muggulu Geethala Muggulu Sivarathri Muggulu
Tip: Use chalk to lightly mark your dot grid first — it wipes away cleanly once your rangoli is finished.
The amazing four lotus rangoli design, crafted with an 8 into 2 dot grid, beautifully symbolizes purity and serenity, making it an ideal choice for various festivals and auspicious occasions. This design features intricate lotus patterns that can be enhanced with vibrant colors, allowing beginners to explore their creativity. For those looking for more inspiration, the Trendy Creative Kolam Designs can offer additional ideas that complement the elegance of this rangoli style.
Creating this rangoli involves a combination of simple strokes and symmetrical patterns, making it accessible for novices while still appealing to experienced artists. The lotus motif is often associated with prosperity and happiness, which aligns perfectly with the spirit of celebrations. For a more elaborate floral display, you might want to check out the Festival Flower Rangoli With 9×9 for additional techniques. To learn more about the rich tradition of rangoli, visit this informative page.
Amazing Four Lotus Rangoli — Step by Step Guide
Read through the steps before you begin so the sequence feels familiar when you start drawing.
- Clear a flat surface and set down your dot grid using rice flour or chalk.
- Confirm the dot spacing is even — uneven dots are the biggest cause of wobbly curves.
- Begin tracing from the centre outward, following the curves shown in the video above.
- Fill the petals and sections with your chosen colours, working one area at a time.
- Finish the edges with a fine line for a sharp, photograph-ready result.
What You Will Learn
- Simple Rangoli Designs
- Rangoli
- Muggulu
- Rangoli Designs
- Rangoli Kolam
- Kolam
Frequently Asked Questions
How do I draw this rangoli?
Start by marking an even dot grid on a flat, clean surface. Once the grid is in place, connect the dots following the curves shown in the video. Even spacing between dots is the single biggest factor for a clean finish.
Is this suitable for beginners?
Beginner-friendly is exactly the right description. The video walks through every line clearly and you can match the pace.
What materials do I need?
Powder (white for outlines, colours for filling), a flat surface, and a dot stencil if you want absolute precision. Beyond that, just your hand and a steady pace.
How long does it take?
The tutorial is 2 min 50 sec long. With practice the actual drawing settles around 10 minutes; the first time will likely take twice that.
A reminder that beautiful art does not need expensive materials — just a steady hand, a clean surface, and a few pinches of rice flour.


Leave a Reply