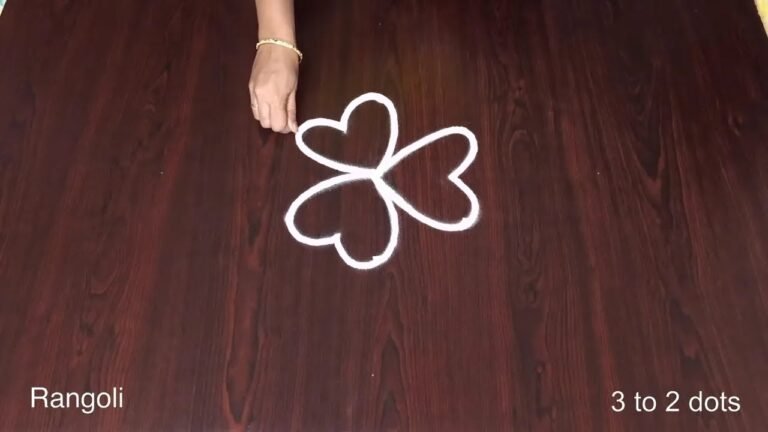
Looking to learn Latest Ugadi Special Parrot? This step-by-step guide walks you through every line, dot, and curve.

Latest Ugadi Special Parrot Rangoli 13 to 1 | Dots Small Birds Kolam Pandaga Muggu Thank you so much for watching Channel
My Rangoli Channel Contains : Rangoli Designs Sankranthi Muggulu
Diwali Rangoli Ratham Muggulu Kolam Designs
Muggulu Designs Chukkala Muggulu Easy Rangoli
Simple Rangoli Easy Rangoli Designs Dhanurmasam Muggulu
Melikala Muggulu Geethala Muggulu Sivarathri Muggulu
Tip: Work from the centre outward. It keeps the symmetry honest and prevents the design from drifting off-balance.
The latest Ugadi special parrot kolam is a delightful representation of the festive spirit associated with this auspicious occasion. Crafted using a 13 to 1 dot grid, this design features charming parrot motifs that symbolize joy and prosperity. As one of the traditional muggulu styles, it is perfect for beginners who wish to adorn their homes during Ugadi celebrations. For those looking to explore more designs, you can check out the 7 Se 7 Dots Rangoli for Learners which offers simple patterns that are easy to replicate.
Rangoli, known for its vibrant colors and intricate patterns, plays a significant role in Indian festivals. The parrot kolam is not just visually appealing but also encourages creativity and community participation. As you create this design, consider incorporating other elements of Ugadi, such as flowers and fruits, to enhance its festive charm. If you’re interested in exploring different styles, the Kolam Pongal Flower design can inspire further creativity in your rangoli journey. You can learn more about the art of rangoli by visiting this link.
Latest Ugadi Special Parrot — Step by Step Guide
Here is how to draw it, line by line. Take your time on the corners and the symmetry will take care of itself.
- Clear a flat surface and set down your dot grid using rice flour or chalk.
- Confirm the dot spacing is even — uneven dots are the biggest cause of wobbly curves.
- Begin tracing from the centre outward, following the curves shown in the video above.
- Fill the petals and sections with your chosen colours, working one area at a time.
- Finish the edges with a fine line for a sharp, photograph-ready result.
What You Will Learn
- Ugadi Rangoli With Dots
- Ugadi Rangoli Side Designs
- Ugadi Rangoli Simple
- Ugadi Rangoli Easy
- Rangoli Ugadi Special
- Ugadi Rangoli Designs With Dots
Frequently Asked Questions
How do I draw this rangoli?
It looks complex but follows a simple rhythm: dots first, then loops. Mark the grid, take a breath, and trace the curves at a steady pace. The pattern emerges on its own.
Is this suitable for beginners?
Yes — this design is shaped specifically with newcomers in mind. The dot grid is small enough to manage, and the curves are gentle. Most learners get it right by the second try.
What materials do I need?
You will need rice flour or rangoli powder (white, plus your choice of colours), a flat surface like a clean floor or courtyard, and optionally a dot stencil if you are new to grid-drawing.
How long does it take?
The full demonstration takes 7 min 59 sec. Most people find their own drawing time settles to about 15 minutes once the grid is familiar.
There is real pleasure in finishing a kolam at your own doorstep — even more so when the pattern is one you have practised before. Make this one of those.


Leave a Reply