10 To 2 Dots 2 combines tradition with simplicity, making it one of the most rewarding designs to practice at home.

10 to 2 dots Ugadi Special Muggulu Latest | Panduga Kolam Butterfly Rangoli Designs | RamRangoli Thank you so much for watching Channel
My Rangoli Channel Contains : Rangoli Designs Sankranthi Muggulu
Diwali Rangoli Ratham Muggulu Kolam Designs
Muggulu Designs Chukkala Muggulu Easy Rangoli
Simple Rangoli Easy Rangoli Designs Dhanurmasam Muggulu
Melikala Muggulu Geethala Muggulu Sivarathri Muggulu
Tip: A slightly damp brush along the edges gives a sharper finish, especially for festival photographs.
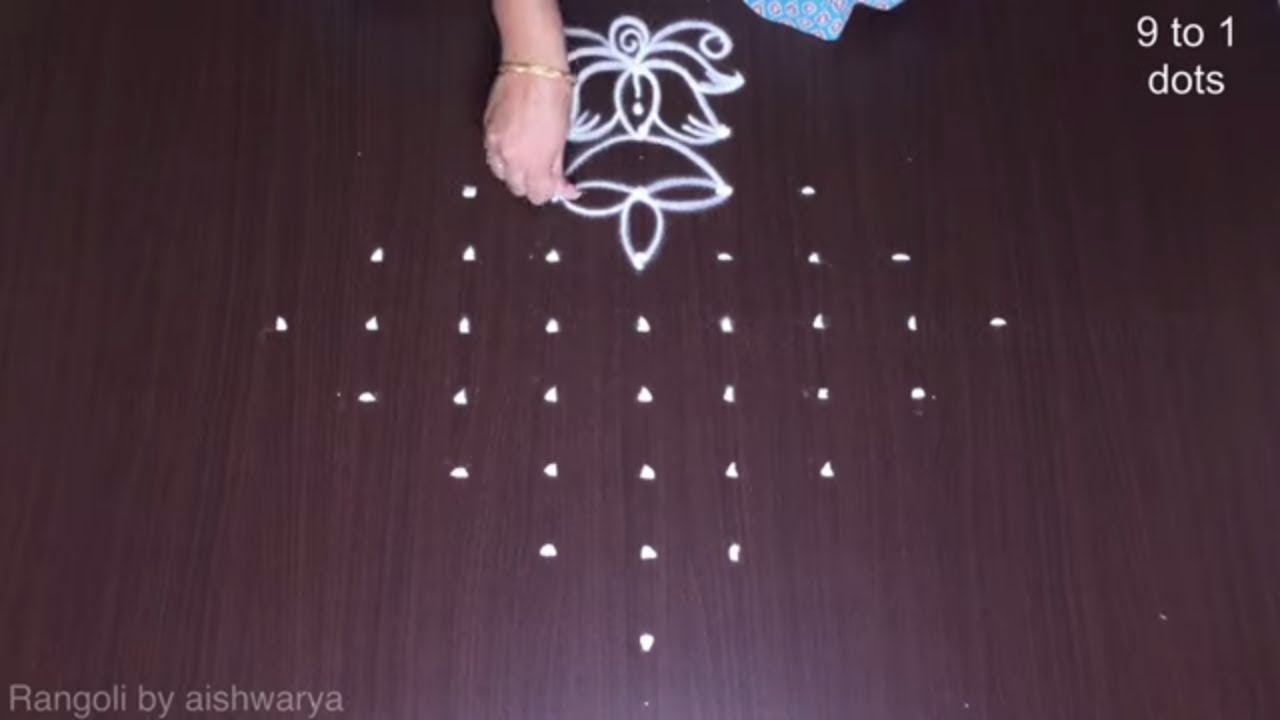
The 10 to 2 dots Ugadi Muggulu is a delightful design that beautifully embodies the spirit of the Ugadi festival. This intricate pattern features a series of symmetrical shapes that radiate outward, creating a sense of harmony and festivity. As you create this muggulu, you can experiment with various colors to enhance its visual appeal, making it a perfect addition to your home during this auspicious time. If you’re interested in exploring more designs, check out this Big Dot Rangoli Muggulu for inspiration.
Traditionally, Ugadi marks the onset of the new year in the Telugu and Kannada communities, and this muggulu design serves as a warm welcome to the season. The use of 10 to 2 dots allows for creativity while maintaining simplicity, making it suitable for beginners. For those looking to broaden their skills, the Attractive Simple Kolam Design can be a wonderful next step in your rangoli journey. To learn more about the cultural significance of these art forms, visit this page.
About this design: To 2 Dots Ugadi is a beginner-friendly pattern that comes together in just a few minutes. Once you have practised the to 2 dots ugadi dot grid, you can scale it up for festival mornings or scale it down for a daily doorstep. Many learners on our channel make this to 2 dots ugadi their go-to design once they get the rhythm of the curves.
To 2 Dots Ugadi — 10 To 2 Dots 2 — Step by Step Guide
The video above shows the full sequence; the steps below summarise each stage so you can glance back as you draw.
- Clear a flat surface and set down your dot grid using rice flour or chalk.
- Confirm the dot spacing is even — uneven dots are the biggest cause of wobbly curves.
- Begin tracing from the centre outward, following the curves shown in the video above.
- Fill the petals and sections with your chosen colours, working one area at a time.
- Finish the edges with a fine line for a sharp, photograph-ready result.
What You Will Learn
- Ugadi Rangoli With Dots
- Ugadi Rangoli Side Designs
- Ugadi Rangoli Simple
- Ugadi Rangoli Easy
- Rangoli Ugadi Special
- Ugadi Rangoli Designs With Dots
Frequently Asked Questions
How do I draw this rangoli?
Set down the dot grid in pencil or chalk, then follow the loops one petal at a time. If a curve goes off, wipe it and retry — kolam is forgiving.
Is this suitable for beginners?
Absolutely. You can pause and rewind the video at every step. The pattern is straightforward once you have the grid down.
What materials do I need?
Rice flour, coloured rangoli powders, and a clean stretch of floor or paper. Some draw with chalk first to set the grid before powdering over it.
How long does it take?
The full demonstration takes 2 min 22 sec. Most people find their own drawing time settles to about 15 minutes once the grid is familiar.
If you draw this and would like a follow-up design at the same skill level, leave a comment on the video — we read every one and queue up requests.


Leave a Reply