Add a touch of charm to your doorway with Traditional Diyas Rangoli Kolam — clean lines, balanced symmetry, and easy to scale.

Traditional diyas Rangoli beautiful Kolam | 15 to 1 creative Chinna Muggulu Designs. This tutorial will show you how to draw Beautiful Indian traditional art sankranthi muggulu patterns using materials such as dry rice flour, colored sand or flower petals rangoli design by Aishwarya. Simple rangoli designs with dots Kolam pattern is created on the floor in living rooms or courtyards. Draw the Lines step by step as it is shown in this video and will be awesome alpona Design. 😲 The rangoli design for diwali pattern here is one of the amazing latest simple kolam designs. Simple Rangoli Designs and easy rangoli designs by Aishwarya with dots for beginners and intermediate.
1. Simple rangoli 2. Rangoli kolam 3. Rangoli for diwali
4. Simple rangoli design 5. Rangoli design for diwali 6. Alpona design
7. Kolam designs 8. Easy rangoli designs 9. Sankranthi muggulu
10. Muggulu designs 11. Simple kolam 12. Easy rangoli
13. Rangoli designs with dots 14. Chukkala muggulu 15. Pongal kolam
Tip: Keep your powder bowl close to your dominant hand. Small movements give cleaner curves.
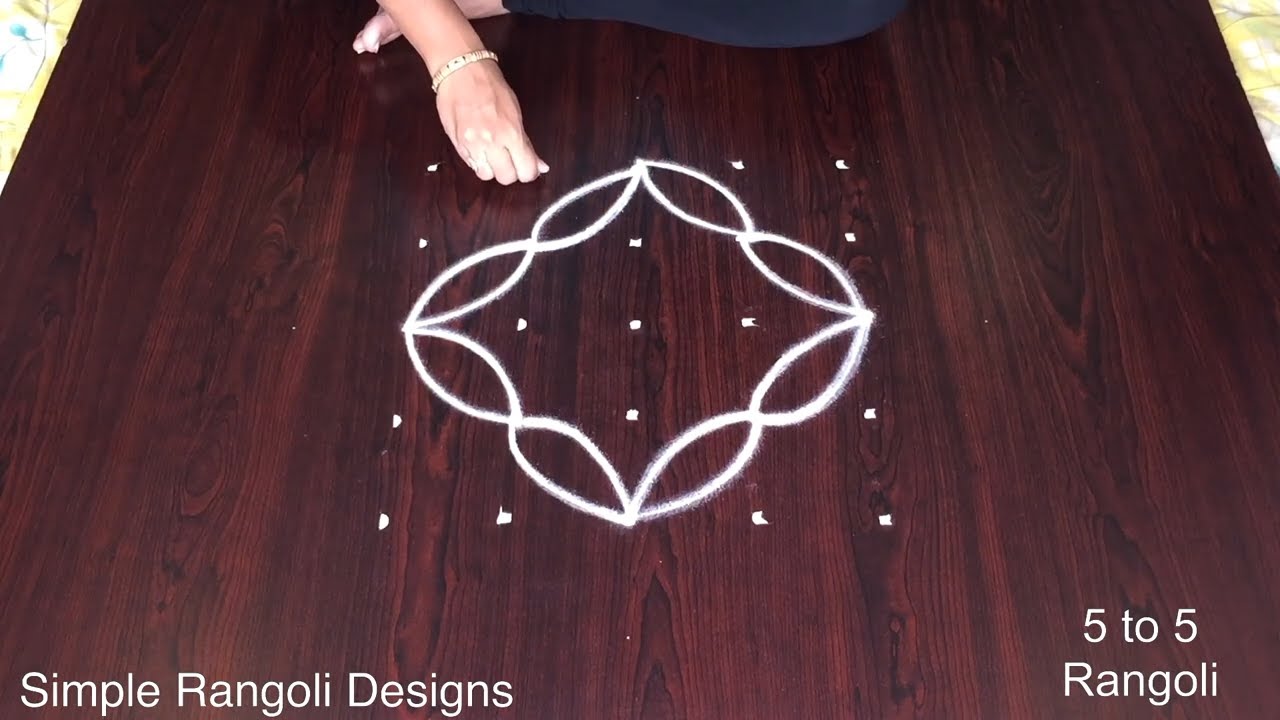
The traditional diyas rangoli kolam is a beautiful and vibrant design often created during the Diwali festival. This design typically features a central motif of diyas, or oil lamps, which symbolize light and prosperity. Beginners can start with simple dot patterns, gradually adding details with colored powders or flower petals to enhance the beauty of the rangoli. If you’re looking for more inspiration, check out this Beautiful Rangoli With 7 Dots post for ideas on how to incorporate dots into your designs.
Creating a traditional diyas rangoli kolam is not just about aesthetic appeal; it also holds cultural significance, representing the victory of light over darkness. The design can be customized with various colors and shapes, making it a versatile choice for decorating homes during celebrations. For those who want to refine their skills, exploring techniques like the ones in Draw Beautiful Deepam Deepala Simple Kolam can provide valuable tips. For a deeper understanding of rangoli’s history and significance, you can visit this Wikipedia page.
Traditional Diyas Rangoli Kolam — Step by Step Guide
If you have drawn dot rangoli before, this will feel familiar. If you have not, the dot grid will guide you.
- Clear a flat surface and set down your dot grid using rice flour or chalk.
- Confirm the dot spacing is even — uneven dots are the biggest cause of wobbly curves.
- Begin tracing from the centre outward, following the curves shown in the video above.
- Fill the petals and sections with your chosen colours, working one area at a time.
- Finish the edges with a fine line for a sharp, photograph-ready result.
What You Will Learn
- Simple Rangoli Designs
- Rangoli
- Muggulu
- Rangoli Designs
- Rangoli Kolam
- Kolam
Frequently Asked Questions
How do I draw this rangoli?
Start by marking an even dot grid on a flat, clean surface. Once the grid is in place, connect the dots following the curves shown in the video. Even spacing between dots is the single biggest factor for a clean finish.
Is this suitable for beginners?
Absolutely. You can pause and rewind the video at every step. The pattern is straightforward once you have the grid down.
What materials do I need?
White rice flour for the outline, coloured powders for the fill, and a clean dry floor. That is the essentials list — you can add a stencil if you prefer.
How long does it take?
A 3 min 40 sec video shows the complete sequence. On paper or floor, expect to spend around a quarter of an hour from grid to finished pattern.
There is real pleasure in finishing a kolam at your own doorstep — even more so when the pattern is one you have practised before. Make this one of those.


Leave a Reply