This 19 to 1 dots tutorial walks you through every step from the dot grid to the final pattern.

Pongal Kolam Designs With 2 is a beautiful kolam pattern you can draw right at your doorstep — perfect for beginners and seasoned rangoli artists alike.
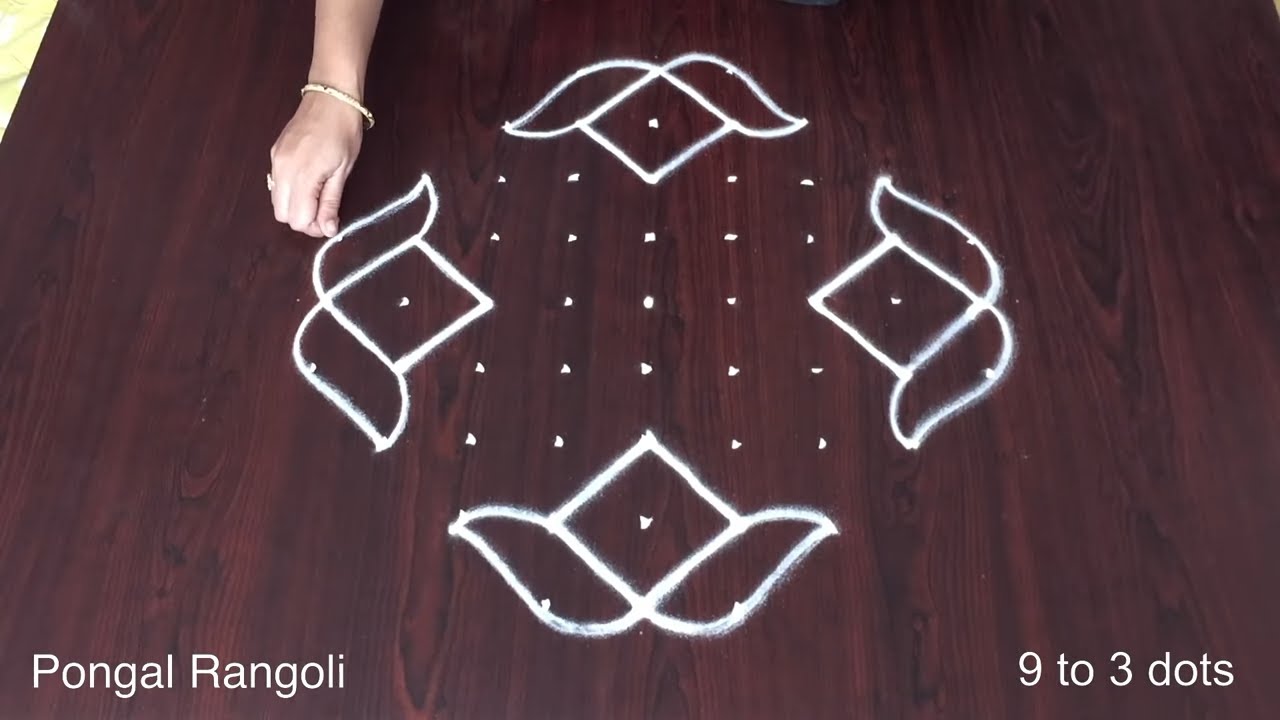
Simple Rangoli Designs presents: Simple Pongal Kolam Designs 19×1 Dots Rangoli and Traditional Sankranthi Muggulu 🌸 In this video, learn a simple & easy rangoli step-by-step. Whether you need a daily rangoli for your home entrance or a beautiful festival rangoli, this design is perfect for beginners! Time: Just 5 minutes for instant, eye-catching beauty.
Style: Classic traditional Muggulu / Kolam vibes with a graceful touch. Perfect for: Everyday doorstep elegance, special Friday, quick festive entrances, or whenever you want your home to feel instantly blessed & welcoming. 🌟 Perfect occasions & styles:
Everyday Home Entrance Rangoli Special Friday Rangoli Pongal Kolam & Sankranti celebrations
Diwali Rangoli Lotus Rangoli Graceful Peacock Rangoli
Door Rangoli Designs Chukkala Muggulu (dot-based patterns) Easy Rangoli Designs / Rangoli with Dots
Chukkala Muggulu / Traditional Kolam Beginners Rangoli / Border Rangoli Latest Rangoli Trends
Tip: Use chalk to lightly mark your dot grid first — it wipes away cleanly once your rangoli is finished.
This Pongal Kolam design featuring 19 to 1 dots is an exquisite representation of traditional artistry, perfect for the festive season. The simplicity of this design makes it accessible for beginners, while still capturing the essence of the celebrations. The elegant patterns not only enhance the home entrance but also symbolize prosperity and warmth during Pongal. For those looking to explore more designs, consider trying the 15 Se 1 Pongal Pot Kolam Colourful for a vibrant twist.
Creating this Kolam can be a joyful experience, allowing you to connect with cultural traditions. The clean lines and symmetrical shapes are typical of traditional Kolam styles, which often incorporate natural motifs and festive symbols. This design can also be a delightful addition to your home decor for special occasions. If you are interested in more intricate patterns, check out the Rose Flower Rangoli With 9x5dots for Pongal for another charming option. For further insights into the art of Rangoli, visit this Wikipedia page.
About this design: 19 To 1 Dots is a beginner-friendly pattern that comes together in just a few minutes. Once you have practised the 19 to 1 dots dot grid, you can scale it up for festival mornings or scale it down for a daily doorstep. Many learners on our channel make this 19 to 1 dots their go-to design once they get the rhythm of the curves.
19 To 1 Dots — Step by Step Guide
These steps are written for absolute beginners. Watch once, draw once, then watch again — that is how the pattern locks in.
- Clear a flat surface and set down your dot grid using rice flour or chalk.
- Confirm the dot spacing is even — uneven dots are the biggest cause of wobbly curves.
- Begin tracing from the centre outward, following the curves shown in the video above.
- Fill the petals and sections with your chosen colours, working one area at a time.
- Finish the edges with a fine line for a sharp, photograph-ready result.
What You Will Learn
- 19X1 Dots Rangoli
- Simple Pongal Kolam Designs
- Traditional Sankranthi Muggulu
- 19X1 Dots Kolam
- Pongal Rangoli With Dots
- Rangoli With Dots
Frequently Asked Questions
How do I draw this rangoli?
It looks complex but follows a simple rhythm: dots first, then loops. Mark the grid, take a breath, and trace the curves at a steady pace. The pattern emerges on its own.
Is this suitable for beginners?
Beginner-friendly is exactly the right description. The video walks through every line clearly and you can match the pace.
What materials do I need?
Just three things: powder (white plus any colours you want), a flat dry surface, and a few minutes of focus. A small bowl per colour helps keep things tidy.
How long does it take?
5 min 33 sec of video, perhaps 20 minutes of practice. The curves take a couple of attempts to feel natural, then it speeds up considerably.
If you draw this and would like a follow-up design at the same skill level, leave a comment on the video — we read every one and queue up requests.


Leave a Reply