Whether you are decorating for a festival or your daily morning ritual, Pongal Paanai Rangoli is an excellent design to keep handy.

This tutorial will show you how to draw Pongal Paanai Rangoli patterns using materials such as dry rice flour, colored sand or flower petals Rangoli designs by Aishwarya. Simple rangoli Pulli Kolam pattern is created on the floor in living rooms or courtyards. Draw the Lines step by step as it is shown in this video and will be awesome Rangoli Design. 😲 The Kundala Muggulu pattern here is one of the amazing latest kolam designs. Simple Rangoli Designs and 8 to 8 dots Kolam by Aishwarya with dots for beginners and intermediate.
For another beginner-friendly variation, try 7 3 Simple Apartment Muggulu.
1. Sankranthi Rangoli Designs 2. Pongal Kolam 2025 3. Sankranti Rangoli Designs
4. Pongal Kolam Rangoli 5. New Year Special Rangoli 6. Pongal Kolam
7. Radham Muggulu 8. Sankranthi Special Rangoli 9. Bhogi Muggulu
10. Pongal Kolam With Dots 11. Sankranthi Muggulu 12. Thipkyanchi Rangoli Designs
13. Mattu Pongal Kolam 14. Sankranthi Muggulu 2025 15. ठिपक्यांची रांगोळी
Tip: A slightly damp brush along the edges gives a sharper finish, especially for festival photographs.
The Pongal Paanai Rangoli is a beautiful design often created during the Sankranthi festival, symbolizing abundance and prosperity. This rangoli showcases the traditional pot (paanai) filled with Pongal, a sweet dish made from rice and jaggery, which is an essential offering during the celebrations. The intricate patterns and vibrant colors not only add charm to the home but also reflect the festive spirit. For those looking to explore more festive designs, the 9 Dots Chukkala Muggulu for Festivals can provide additional inspiration.
Creating a Pongal Paanai Rangoli involves using materials like dry rice flour and colored sand, making it accessible for beginners. Each stroke is crafted with care, reflecting the joy of the festival. While you can find numerous designs, this one particularly stands out for its representation of the harvest season. For further learning, you might enjoy checking out 15 Se 1 Pongal Pot Kolam Colourful, which offers tips on enhancing your rangoli-making skills. For more background on this art form, visit this Wikipedia page.
Pongal Paanai Rangoli — Step by Step Guide
Follow the steps below to recreate this design at home. Pause the video whenever you need — there is no hurry.
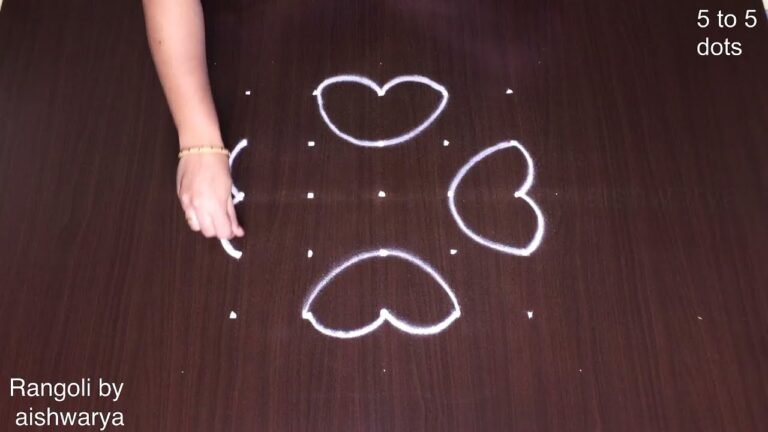
- Mark the 8-by-8 dot grid.
- In the centre draw a small flower, and flank it left and right with looped 'kundala' knots so the middle reads as a linked chain of loops.
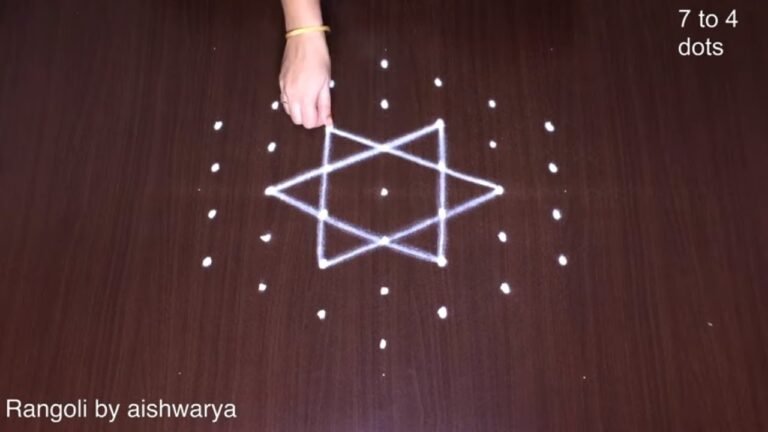
- From the centre outward along each diagonal, draw a hatched (striped) triangular petal reaching toward a corner.
- In each corner, cap that petal with a folded fan of nested arcs.
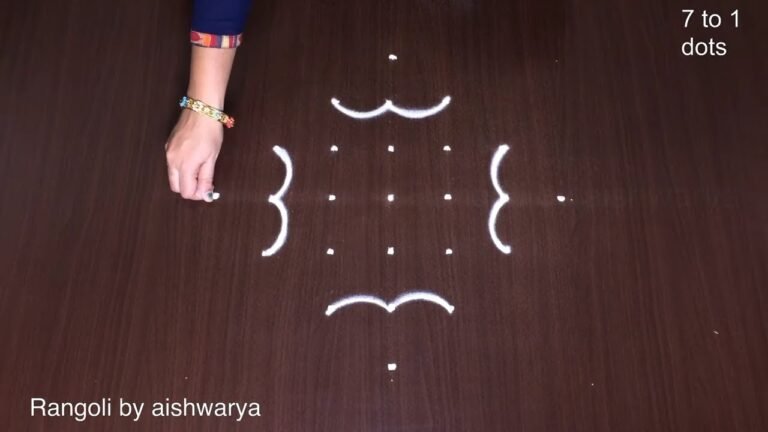
- From the mid-point of each side, draw a small upright sprig — a short stem with a couple of leaves — pointing out to the edge dot.
- Keep the whole muggulu symmetric across both axes and both diagonals.
- Outline in white and shade the hatched petals.
What You Will Learn
- Simple Rangoli Designs
- Rangoli
- Muggulu
- Rangoli Designs
- Rangoli Kolam
- Kolam
Frequently Asked Questions
How do I draw this rangoli?
Set down the dot grid in pencil or chalk, then follow the loops one petal at a time. If a curve goes off, wipe it and retry — kolam is forgiving.
Is this suitable for beginners?
Yes, and it is one we recommend to first-timers. The small grid keeps the design manageable while still teaching the core technique.
What materials do I need?
Powder (white for outlines, colours for filling), a flat surface, and a dot stencil if you want absolute precision. Beyond that, just your hand and a steady pace.
How long does it take?
4 min 18 sec of video, perhaps 20 minutes of practice. The curves take a couple of attempts to feel natural, then it speeds up considerably.
Roll up your sleeves, grab a handful of rice flour, and give this design ten quiet minutes. The result is worth the small effort.


Leave a Reply