6X6 Middle Dots Rangoli has become a favourite among learners on our channel — and once you try it, you will see why.
For another beginner-friendly variation, try Daily Kolams Latest Rangoli Designs.
Learn more about the tradition of Rangoli on Wikipedia.
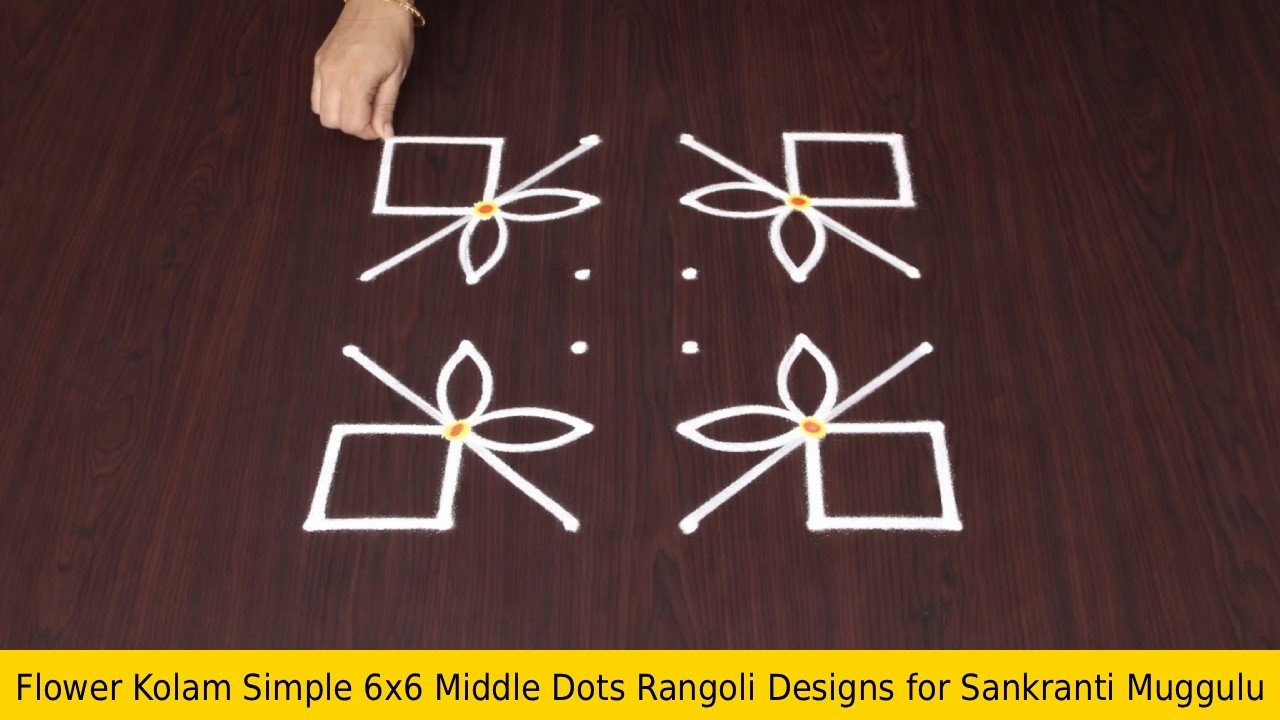
Looking for a beautiful 6×6 middle dots rangoli for Sankranthi? This simple and elegant design is perfect for festive entrances and beginners. In this video, I guide you step by step to create a neat and symmetrical 6×6 middle dots rangoli designs simple and easy using a structured square grid. If you are searching for 6×6 middle dots rangoli easy and beautiful, this tutorial will help you understand spacing, alignment, and smooth curve formation.
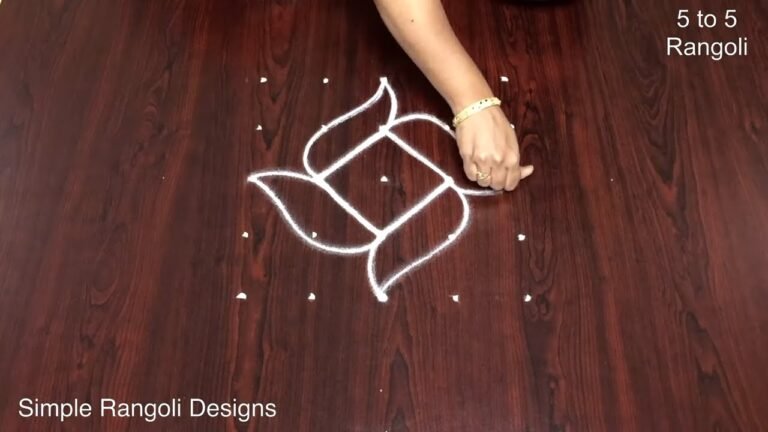
We begin by placing the full 6×6 middle dot structure clearly to form a strong foundation. Then the curves develop gradually, transforming the grid into a graceful festive pattern. This method makes it ideal for beginners looking for 6×6 middle dots rangoli easy design tutorials. How to construct a proper 6×6 middle dots rangoli with dots grid How to create balanced 6×6 middle dots rangoli designs easy
How to refine curves for 6×6 middle dots rangoli easy and simple How to draw neat and structured muggulu sankranthi muggulu This design works beautifully as festive muggulu sankranthi muggulu new decoration and is perfect for small entrances and apartment doorways. The middle-dot square layout keeps the design symmetrical while remaining beginner-friendly.
If you are searching for 6×6 middle dots rangoli designs simple, or elegant square-grid kolams for Sankranthi mornings, this structured approach will help you recreate it confidently. Watch till the end to see how the full middle-dot grid transforms into a balanced and festive rangoli. If you enjoy square dot layouts, explore more creative Sankranthi and festival kolam tutorials on the channel.
Tip: A slightly damp brush along the edges gives a sharper finish, especially for festival photographs.
6X6 Middle Dots Rangoli — Step by Step Guide
Here is how to draw it, line by line. Take your time on the corners and the symmetry will take care of itself.
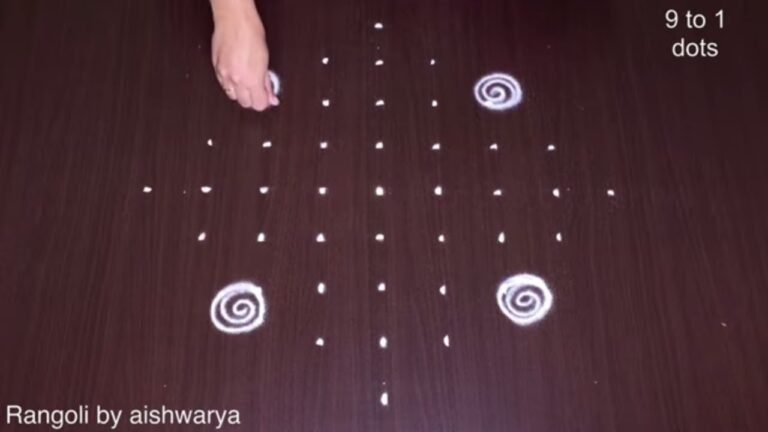
- Clear a flat surface and set down your dot grid using rice flour or chalk.
- Confirm the dot spacing is even — uneven dots are the biggest cause of wobbly curves.
- Begin tracing from the centre outward, following the curves shown in the video above.
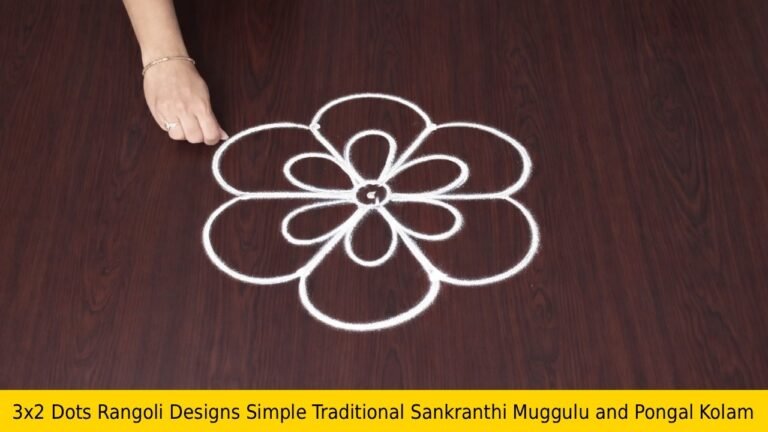
- Fill the petals and sections with your chosen colours, working one area at a time.
- Finish the edges with a fine line for a sharp, photograph-ready result.
What You Will Learn
- 6X6 Middle Dots Rangoli
- 6X6 Middle Dots Rangoli Designs
- Muggulu Sankranthi Muggulu
- 6X6 Middle Dots Rangoli Designs Simple And Easy
- 6X6 Middle Dots Rangoli Designs Simple
- 6X6 Middle Dots Rangoli Easy
Frequently Asked Questions
How do I draw this rangoli?
It looks complex but follows a simple rhythm: dots first, then loops. Mark the grid, take a breath, and trace the curves at a steady pace. The pattern emerges on its own.
Is this suitable for beginners?
It is one of the more forgiving designs in our collection. Beginners often pick it as a confidence-builder before moving on to larger grids.
What materials do I need?
You will need rice flour or rangoli powder (white, plus your choice of colours), a flat surface like a clean floor or courtyard, and optionally a dot stencil if you are new to grid-drawing.
How long does it take?
You will see a 3 min 28 sec walkthrough above. Drawing it yourself is usually a 12–18 minute affair, slightly slower the first time.
This is one of those designs that grows on you. The first attempt is for learning; the second is for muscle memory; the third is when it starts to feel like your own.
Leave a Reply