Pongal Kolam With Colour has become a favourite among learners on our channel — and once you try it, you will see why.

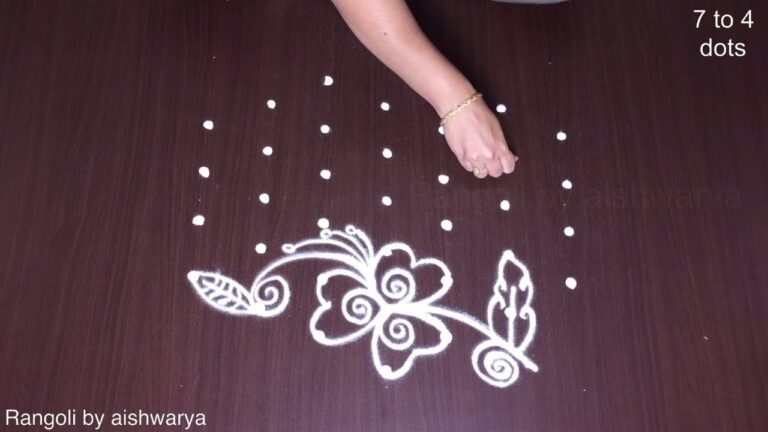
This tutorial will show you how to draw Sankranthi Special Rangoli patterns using materials such as dry rice flour, colored sand or flower petals Rangoli designs by Aishwarya. Simple rangoli Pulli Kolam pattern is created on the floor in living rooms or courtyards. Draw the Lines step by step as it is shown in this video and will be awesome Rangoli Design. 😲 The 11 to 6 Dots Muggulu pattern here is one of the amazing latest kolam designs. Simple Rangoli Designs and Pongal Kolam With Colour by Aishwarya with dots for beginners and intermediate.
1. Sankranthi Rangoli Designs 2. Pongal Kolam 2025 3. Sankranti Rangoli Designs
4. Pongal Kolam Rangoli 5. New Year Special Rangoli 6. Pongal Kolam
7. Radham Muggulu 8. Sankranthi Special Rangoli 9. Bhogi Muggulu
10. Pongal Kolam With Dots 11. Sankranthi Muggulu 12. Thipkyanchi Rangoli Designs
13. Mattu Pongal Kolam 14. Sankranthi Muggulu 2025 15. ठिपक्यांची रांगोळी
Tip: Use chalk to lightly mark your dot grid first — it wipes away cleanly once your rangoli is finished.
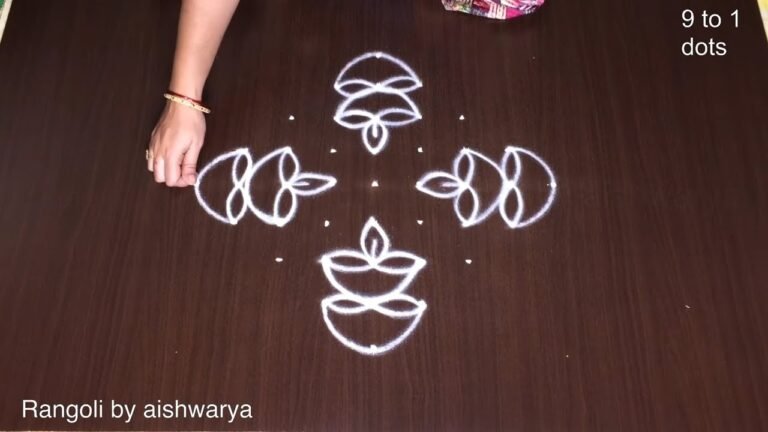
The Pongal Kolam with colour is a delightful representation of the festive spirit during Sankranthi. Typically designed with 11 to 6 dots, this pattern allows for creativity and personalization. Using materials like dry rice flour, powdered colours, or flower petals, you can create vibrant designs that enhance the beauty of your living space. For more ideas, check out this Lotus Flowers Rangoli Designs for Sankranti post to find inspiration for your festive celebrations.
This particular kolam style is not only visually appealing but also serves as a warm welcome for guests during the festive season. The process of creating such intricate patterns can be soothing and rewarding for beginners and experienced artists alike. If you’re looking for more everyday designs, consider exploring Every Day Morning Rangoli for simple yet beautiful patterns. To learn more about the history and significance of rangoli, you can visit this link.
Pongal Kolam With Colour — Step by Step Guide
If you have drawn dot rangoli before, this will feel familiar. If you have not, the dot grid will guide you.
- Clear a flat surface and set down your dot grid using rice flour or chalk.
- Confirm the dot spacing is even — uneven dots are the biggest cause of wobbly curves.
- Begin tracing from the centre outward, following the curves shown in the video above.
- Fill the petals and sections with your chosen colours, working one area at a time.
- Finish the edges with a fine line for a sharp, photograph-ready result.
What You Will Learn
- Simple Rangoli Designs
- Rangoli
- Muggulu
- Rangoli Designs
- Rangoli Kolam
- Kolam
Frequently Asked Questions
How do I draw this rangoli?
Start by marking an even dot grid on a flat, clean surface. Once the grid is in place, connect the dots following the curves shown in the video. Even spacing between dots is the single biggest factor for a clean finish.
Is this suitable for beginners?
Yes — this design is shaped specifically with newcomers in mind. The dot grid is small enough to manage, and the curves are gentle. Most learners get it right by the second try.
What materials do I need?
White rice flour for the outline, coloured powders for the fill, and a clean dry floor. That is the essentials list — you can add a stencil if you prefer.
How long does it take?
The full demonstration takes 7 min 1 sec. Most people find their own drawing time settles to about 15 minutes once the grid is familiar.
Half the skill of kolam is learning to slow down. Put on some music, give yourself the time, and let the curves come naturally.

Leave a Reply