Whether you are decorating for a festival or your daily morning ritual, Janmastami Kolam 11 Se is an excellent design to keep handy.
Janmastami Kolam 11 se 1 Krishnastami | Muggulu Krishna Jayanthi Rangoli | RamRangoli Aishwarya Thank you so much for watching Channel
My Ram Rangoli Channel Contains : Rangoli Designs Sankranthi Muggulu
Diwali Rangoli Ratham Muggulu Kolam Designs
Muggulu Designs Chukkala Muggulu Easy Rangoli
Simple Rangoli Easy Rangoli Designs Dhanurmasam Muggulu
Melikala Muggulu Geethala Muggulu Sivarathri Muggulu
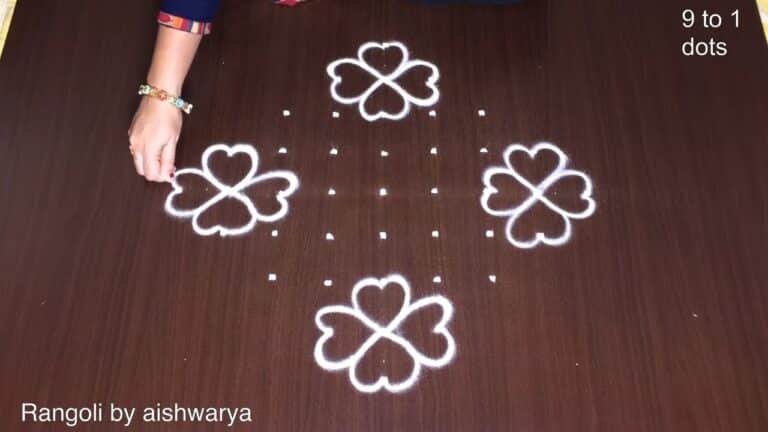
Tip: Practice on paper first if you are new to dot kolam. The grid is the same; only the surface changes.
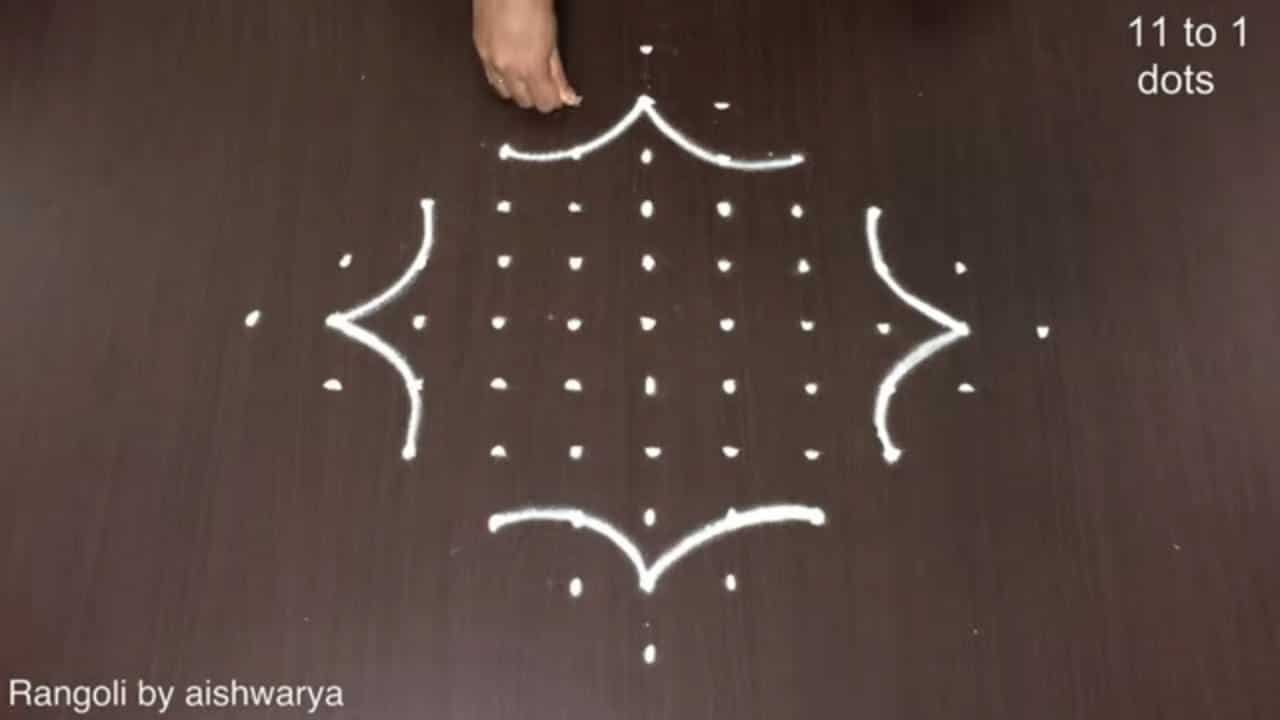
The Janmastami Kolam 11 Se 1 is a beautiful representation of the festivities surrounding Lord Krishna’s birth. This design features 11 dots arranged in a unique pattern, creating a stunning visual impact that is both traditional and appealing. It serves as a perfect decoration for the occasion of Krishnastami, also known as Janmashtami, when devotees celebrate with various artistic expressions. For more inspiration, you might want to explore the Big Dot Rangoli Muggulu or the Trendy Creative Kolam Designs.
Creating this kolam requires a bit of practice, especially for beginners. The design incorporates elements that reflect the joyous spirit of the festival, making it a delightful addition to any home. As you work on this kolam, you’ll find that it not only enhances your artistic skills but also brings a sense of community and celebration. For those interested in learning more about the art form, you can read about its rich history on Wikipedia, which provides insights into various rangoli styles and their cultural significance.
Janmastami Kolam 11 Se — Step by Step Guide
These steps are written for absolute beginners. Watch once, draw once, then watch again — that is how the pattern locks in.
- Clear a flat surface and set down your dot grid using rice flour or chalk.
- Confirm the dot spacing is even — uneven dots are the biggest cause of wobbly curves.
- Begin tracing from the centre outward, following the curves shown in the video above.
- Fill the petals and sections with your chosen colours, working one area at a time.
- Finish the edges with a fine line for a sharp, photograph-ready result.
What You Will Learn
- Simple Rangoli Designs
- Rangoli
- Muggulu
- Rangoli Designs
- Rangoli Kolam
- Kolam
Frequently Asked Questions
How do I draw this rangoli?
Set down the dot grid in pencil or chalk, then follow the loops one petal at a time. If a curve goes off, wipe it and retry — kolam is forgiving.
Is this suitable for beginners?
Yes, and it is one we recommend to first-timers. The small grid keeps the design manageable while still teaching the core technique.
What materials do I need?
You will need rice flour or rangoli powder (white, plus your choice of colours), a flat surface like a clean floor or courtyard, and optionally a dot stencil if you are new to grid-drawing.
How long does it take?
The full demonstration takes 3 min 11 sec. Most people find their own drawing time settles to about 15 minutes once the grid is familiar.
If you enjoyed this design, browse our other dot-pattern tutorials — they share the same approach and build naturally on the techniques here.


Leave a Reply