There is something timeless about 4 Different Style Diya — the symmetry, the rhythm of the dots, and the soft curves it produces.

4 Different style Diyas easy BEGINNERS muggulu designs | 12×2 New simple kolam rangoli for divali. This tutorial will show you how to draw Beautiful Indian traditional art sankranthi muggulu patterns using materials such as dry rice flour, colored sand or flower petals Rangoli designs by Aishwarya. Simple rangoli designs with dots Kolam pattern is created on the floor in living rooms or courtyards. Draw the Lines step by step as it is shown in this video and will be awesome Rangoli Design. 😲 The rangoli design for diwali pattern here is one of the amazing latest simple kolam designs. Simple Rangoli Designs and easy rangoli designs by Aishwarya with dots for beginners and intermediate.
1. Diwali Rangoli 2. Pongal kolams 3. Easy rangoli designs
4. Rangoli design 5. Chukkala muggulu 6. Dot rangoli designs
7. Rangoli for diwali 8. Rangoli Simple 9. Easy rangoli designs
10. Kolam designs 11. Simple rangoli design 12. Muggulu designs
13. Muggulu designs with dots 14. Small rangoli designs 15. Muggulu chukkala muggulu
Tip: A slightly damp brush along the edges gives a sharper finish, especially for festival photographs.
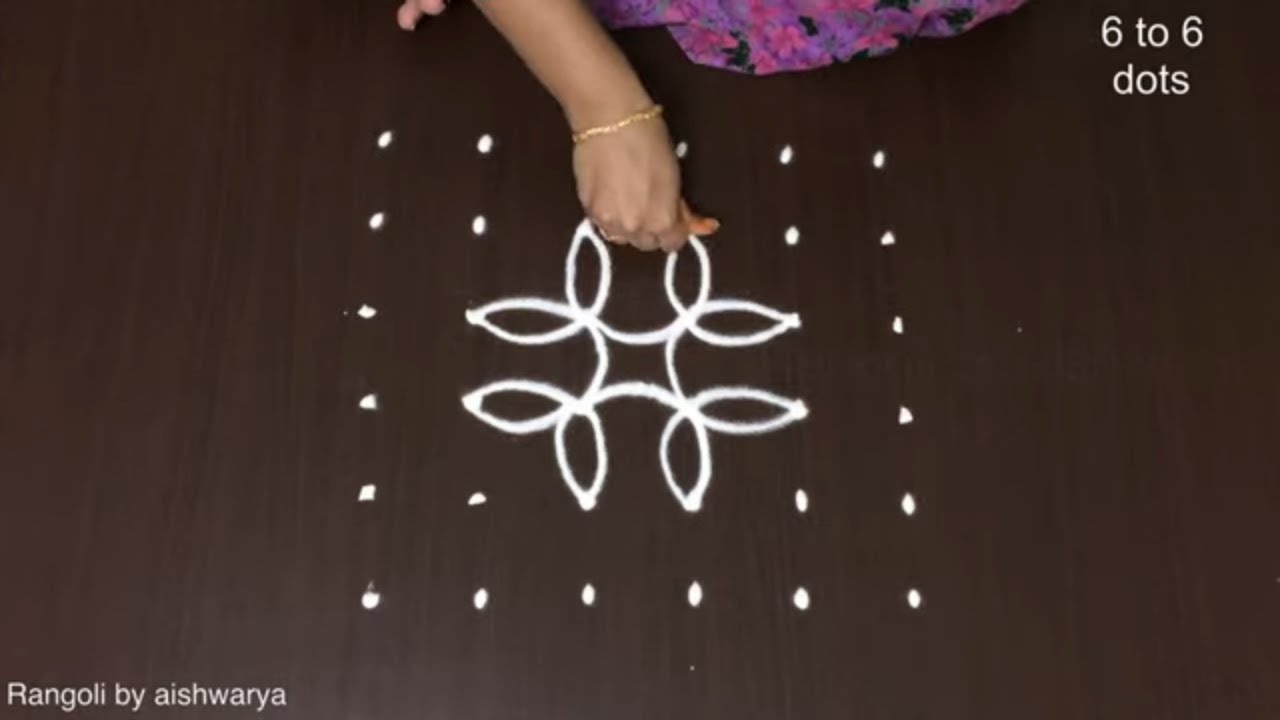
The 4 different style diya kolam is a delightful addition to the festive decorations during Navratri. This design typically features a grid of dots arranged in a 12×2 pattern, which serves as the foundation for intricate designs that symbolize light and prosperity. Drawing this kolam can be a wonderful way for beginners to practice their skills while celebrating the spirit of the festival. If you’re looking for more inspiration, check out the How to Draw 12×2 Deepam Rangoli Designs for additional patterns.
These diya kolams can be created using various materials such as rice flour or colored sand, making them versatile for any occasion. As the diyas are placed within the designs, they illuminate the patterns beautifully, enhancing the festive atmosphere. For those interested in exploring more traditional styles, the Traditional Friday Diya Pulli Designs Rangoli offers a great way to deepen your understanding of this art form. To learn more about the broader world of rangoli, visit this page.
4 Different Style Diya — Step by Step Guide
The video above shows the full sequence; the steps below summarise each stage so you can glance back as you draw.
- Clear a flat surface and set down your dot grid using rice flour or chalk.
- Confirm the dot spacing is even — uneven dots are the biggest cause of wobbly curves.
- Begin tracing from the centre outward, following the curves shown in the video above.
- Fill the petals and sections with your chosen colours, working one area at a time.
- Finish the edges with a fine line for a sharp, photograph-ready result.
What You Will Learn
- Simple Rangoli Designs
- Rangoli
- Muggulu
- Rangoli Designs
- Rangoli Kolam
- Kolam
Frequently Asked Questions
How do I draw this rangoli?
Start by marking an even dot grid on a flat, clean surface. Once the grid is in place, connect the dots following the curves shown in the video. Even spacing between dots is the single biggest factor for a clean finish.
Is this suitable for beginners?
It is one of the more forgiving designs in our collection. Beginners often pick it as a confidence-builder before moving on to larger grids.
What materials do I need?
You will need rice flour or rangoli powder (white, plus your choice of colours), a flat surface like a clean floor or courtyard, and optionally a dot stencil if you are new to grid-drawing.
How long does it take?
The full demonstration takes 3 min 10 sec. Most people find their own drawing time settles to about 15 minutes once the grid is familiar.
If you draw this and would like a follow-up design at the same skill level, leave a comment on the video — we read every one and queue up requests.


Leave a Reply