Drawing Amazing Padi Kolam For is a relaxing, almost meditative practice. The dots guide your hand and the design unfolds naturally.

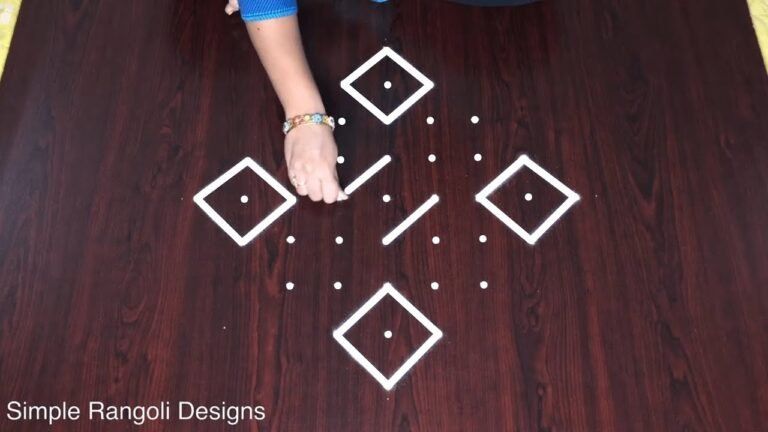
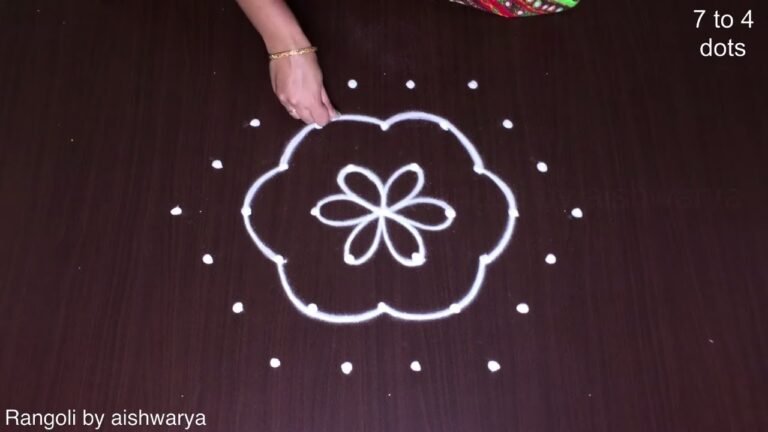
Amazing Padi Kolam for Deepawali 9 by 5 | Beautiful Muggulu by Simple Rangoli Designs. This tutorial will show you how to draw Beautiful Indian traditional art sankranthi muggulu patterns using materials such as dry rice flour, colored sand or flower petals rangoli design by Aishwarya. Simple rangoli designs with dots Kolam pattern is created on the floor in living rooms or courtyards. Draw the Lines step by step as it is shown in this video and will be awesome alpona Design. 😲 The rangoli design for diwali pattern here is one of the amazing latest simple kolam designs. Simple Rangoli Designs and easy rangoli designs by Aishwarya with dots for beginners and intermediate.
1. Simple rangoli 2. Rangoli kolam 3. Rangoli for diwali
4. Simple rangoli design 5. Rangoli design for diwali 6. Alpona design
7. Kolam designs 8. Easy rangoli designs 9. Sankranthi muggulu
10. Muggulu designs 11. Simple kolam 12. Easy rangoli
13. Rangoli designs with dots 14. Chukkala muggulu 15. Pongal kolam
Tip: A slightly damp brush along the edges gives a sharper finish, especially for festival photographs.
The amazing padi kolam for Deepawali features a captivating 9 by 5 dot pattern that beautifully complements the festive spirit of Diwali. This traditional design serves as an elegant welcome to guests, as it is often drawn in courtyards or entryways. Using simple materials like rice flour or colored sand, beginners can easily create this stunning kolam. For more inspiration, you might also explore our Diwali Festival Muggulu Rangoli post, which showcases various designs suited for the occasion.
This kolam design not only enhances the beauty of your home but also reflects the rich cultural heritage of Indian art. With its intricate lines and patterns, the amazing padi kolam invites brightness and positivity into your space. As you practice this design, you can also check out our Rose Flower Rangoli With 9x5dots for Pongal for more ideas on creating delightful patterns. For those interested in the history and significance of rangoli, visit this informative page.
About this design: Padi Kolam For Deepawali is a beginner-friendly pattern that comes together in just a few minutes. Once you have practised the padi kolam for deepawali dot grid, you can scale it up for festival mornings or scale it down for a daily doorstep. Many learners on our channel make this padi kolam for deepawali their go-to design once they get the rhythm of the curves.
Padi Kolam For Deepawali — Step by Step Guide
Each step takes only a moment. The whole design comes together in just a few minutes once the grid is in place.
- Clear a flat surface and set down your dot grid using rice flour or chalk.
- Confirm the dot spacing is even — uneven dots are the biggest cause of wobbly curves.
- Begin tracing from the centre outward, following the curves shown in the video above.
- Fill the petals and sections with your chosen colours, working one area at a time.
- Finish the edges with a fine line for a sharp, photograph-ready result.
What You Will Learn
- Simple Rangoli Designs
- Rangoli
- Muggulu
- Rangoli Designs
- Rangoli Kolam
- Kolam
Frequently Asked Questions
How do I draw this rangoli?
The grid comes first. Use a soft chalk to dot the surface, count twice to confirm the spacing, then start connecting them following the video. Work from the centre outward.
Is this suitable for beginners?
Yes, and it is one we recommend to first-timers. The small grid keeps the design manageable while still teaching the core technique.
What materials do I need?
Rice flour, coloured rangoli powders, and a clean stretch of floor or paper. Some draw with chalk first to set the grid before powdering over it.
How long does it take?
The video runs 5 min 3 sec. In practice, most learners take between 10 and 20 minutes — a little longer the first time, faster as the pattern becomes familiar.
We rotate festival designs through the year — bookmark the homepage and you will find a new pattern every morning.
Leave a Reply